
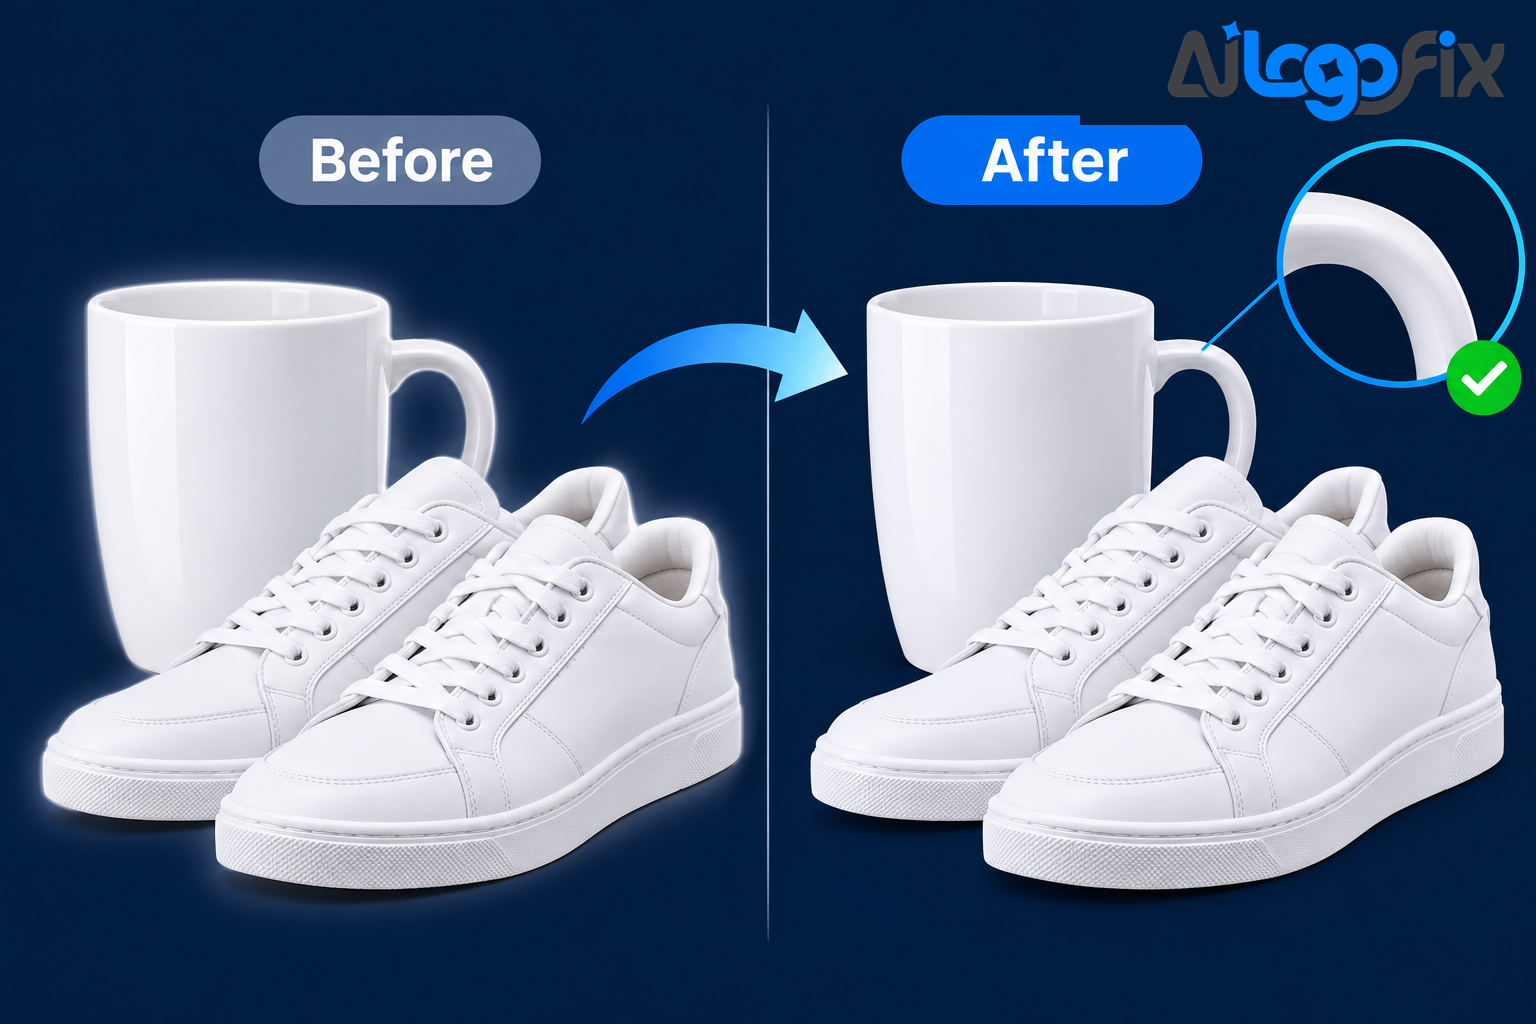
You remove the background from a product photo, drop the cutout onto a dark banner, and there it is: a thin pale ring hugging the edge of your product, like a sticker cut out with slightly dull scissors. On the white studio background it looked perfect — on anything darker, it looks fake.
That pale ring is called a white halo, or fringe — one of the most common reasons a cutout looks amateur, even when the removal itself was accurate. Halos are not random: they have specific causes, and once you know them, you can prevent most at the photo stage and fix the rest in minutes.
This guide explains what a halo is, its five causes, and a five-step fix for Photoshop, Photopea, GIMP, and most AI background removers.
What a white halo actually is
Digital photos have no infinitely sharp edges: the pixels along your subject's outline are a blend of subject and the background — a process called anti-aliasing. A good cutout handles that band with partial transparency, so an edge pixel that is half subject becomes half opaque.
The problem is the pixel's colour. The camera recorded a mix of dark fabric and white wall, so the half-transparent pixel still carries a lot of white. On a white page, nobody sees a problem — the missing half is white anyway. Put the same cutout on dark blue, black, or a coloured background, and every edge pixel shows its leftover white, blended over the new background: a pale rim. Retouchers call it colour contamination or fringing, and a dark background causes the same effect in reverse, as a dark rim on light backgrounds. That is also why halos hide so well — a cutout from a white studio shot looks perfect on white and terrible on black.
The 5 causes of a white halo
1. Blended edge pixels (anti-aliasing)
This is the main cause, and it affects every cutout: edge pixels are always a mix of subject and background, so when the background is removed, the transparency is right but the colour is not. The stronger the contrast — a dark jacket against a bright white wall, for example — the more visible the leftover blend.
2. Soft and semi-transparent edges
Hair, fur, fuzzy sweaters, glass, and anything semi-transparent make the problem worse — far more partially blended pixels than on a smooth, solid edge. A glass bottle or a chrome product has genuinely see-through edges, so no hard cut line exists at all, and AI removers struggle most exactly here.
3. A low-resolution source photo
Low-resolution images have a similar issue: with fewer pixels defining the edge, each blended pixel is larger and more visible. A small, heavily compressed photo gives the remover almost nothing to work with there, so the halo ends up thicker relative to the product. Starting from a bigger file is the simplest prevention — a high-resolution source has a thinner halo.
4. JPEG compression smear
JPEG compression tends to smear colour slightly around high-contrast edges, so a heavily compressed photo can carry faint colour noise at the cutout boundary — and that noise becomes part of the edge after removal. A source saved at low quality, or downloaded and re-saved several times, will halo worse than the same shot saved well.
5. The removal itself: stretched masks, re-cutting, and premultiplied colour
AI removers usually run their model at a fixed size, often around 1,000 pixels, and a cheap way to apply that answer to a 6,000-pixel photo is to stretch the mask six times — so the outline follows an enlarged mask instead of your real pixels, and the fringe grows. Some tools also store transparency "premultiplied", with colours already blended toward white; if a later app reads that as plain transparency, the blend shows up as a light rim.
The most damaging mistake is running an already-cut-out image through the process again: its edge pixels are already a blend of subject and old background, so a second cut treats the fringe as part of the subject. Always re-cut from the original photo, never from a previous cutout.
How to spot a halo before your customers do
The only honest test is to view the cutout against the opposite of its original background: dark, bright, and mid grey, zoomed to at least 200 percent on the edges. Check hair, fur, and fabric first — fringing is strongest there.
The 5-step fix
Work from the original photo, not an existing cutout. These steps take a few minutes per image in Photoshop, and the same ideas apply in Photopea, GIMP, and most AI removers with an edge-refine option.
Step 1: Check the cutout on a contrasting background
Place the cutout on a dark background first, so the halo is visible and you can judge the next steps. Fix it against white and you are fixing blind.
Step 2: Contract the edge by 1 to 2 pixels, then feather slightly
Before you mask, choose Select > Modify > Contract by 1 to 2 pixels, then Feather by 0.5 to 1 pixel. Contracting pulls the selection just inside the subject, cutting off the contaminated outer pixels, and the slight feather keeps the edge soft and natural — heavy feathering makes a cutout look glued on. In most AI removers this is an edge-shift or edge-refine control: move it below zero by a pixel or two.
Step 3: Remove the white matte (Defringe / Decontaminate Colors)
With the cutout layer selected in Photoshop, choose Layer > Matting > Remove White Matte — Defringe does a similar job. Both undo the colour blend rather than deleting pixels. In Select and Mask, Decontaminate Colors recolours edge pixels toward the subject's colour, often the cleanest result on hair and fur.
Step 4: Paint the mask edge by hand
For stubborn spots, add a layer mask and paint with a small soft black brush to hide leftover background — white to bring back parts cut too far. Work at 200 percent zoom. It is slow, but it is the only method that fixes a halo without touching the rest of the edge.
Step 5: Export as PNG and re-check
Save as PNG, which stores transparency — never JPG, which cannot store it and puts white back behind the product, recreating the problem on the next use. After export, check the PNG once more on a dark background and a mid-grey one before you upload it anywhere.
How to prevent halos when you shoot
The cheapest fix is the one you never need. The less contrast between your subject's edge and the old background, the less obvious any leftover blend: shoot against a light background for light pages, and a dark backdrop for dark designs. Keep the subject a few feet from the backdrop so it is softly out of focus and does not spill coloured light onto the edges — a white wall right behind a product bounces white light onto its rim, which reads as a halo. Shoot at the highest resolution your camera allows, and save the source without heavy JPEG compression.
White products on white backgrounds deserve special care: a white sneaker, mug, shirt, or box defeats colour-based selection, because product and backdrop look the same. Use subject-based selection instead, then fix the edge by hand with a layer mask.
When to hand the cutouts to a professional
The five steps above handle most single images. They stop being practical with a catalogue of hundreds of photos, or with glass, jewellery, fur, or chrome — the exact edges where halos are worst and hand work is slowest. A photo that will sit on Amazon, Etsy, and your own store also needs to pass each platform's background and size rules, not just look clean.
That is where a specialist team earns its keep: clean edges on every image, checked on dark and light backgrounds, delivered as transparent PNGs ready to list. AiLogoFix's background removal service does this work by hand, so the halo never reaches your listings — and if the photos also carry a logo that needs redrawing for packaging or inserts, the same team can turn it into a clean vector through the raster to vector service. See also Background Removal for Amazon Product Images and Etsy Product Photos: Background Removal That Sells.
FAQ
Why does the halo only show on dark backgrounds?
Because the halo is leftover light colour in the edge pixels. On a white page, light pixels on light are invisible; move the cutout onto black, navy, or a photograph and the contrast makes every leftover pixel obvious. The halo was always there — the background was hiding it.
Can I fix a white halo without Photoshop?
Yes. Most AI background removers have an edge-shift or edge-refine control — pull the edge in by a pixel or two. Photopea and GIMP work the same way: contract the selection, feather slightly, and use their defringe or colour-decontamination options. The hand-painted mask step needs a layer mask, which both support.
What is the difference between a halo and a jagged edge?
A halo is a thin light or dark rim following the outline — colour contamination from the old background. A jagged edge is a staircase of hard pixel steps along curves, caused by a hard mask or a small mask stretched too far. Different problems, different fixes: shrink or recolour the edge for a halo, use a soft full-resolution mask for jagged edges.
Conclusion
A white halo is not a mystery — it is leftover background colour in the edge pixels, made visible by a contrasting background. Check every cutout on dark, light, and mid-grey at 200 percent, contract the edge by a pixel or two, remove the white matte, paint the stubborn spots by hand, and export as PNG. Shoot against a matching backdrop at full resolution, and most halos never appear at all.
For a single product photo, the five steps above are enough. For a whole catalogue — or for glass, jewellery, and fur, where the edges fight back — a specialist team gets every image clean without eating your week.