
Stationery That Prints Right: Letterheads, Envelopes and Compliment Slips
Business stationery is your brand on paper — and paper is unforgiving. A letterhead with muddy colors or an envelope with clipped text undermines every proposal it carries. Proper stationery printing setup is simple once you know the numbers.
In This Guide
- Letterheads: The Setup
- Envelopes: The Tricky One
- Compliment Slips: Small but Mighty
- Consistency Across the System
- Paper Choice Matters
- FAQs
- Stationery Printing FAQs
- 7 Costly Stationery Printing Mistakes
- Stationery Printing Preflight Checklist
- Pro Tips for Flawless Stationery Printing
- How to Choose a Stationery Printer
- Stationery Printing Costs Explained
- Stationery in the Digital Age
- When to Hire a Designer for Your Stationery
- Quick Recap
- Stationery Printing Glossary
Quick answer: Set up stationery at exact paper size + 3mm bleed, 300 DPI, CMYK, with text 10–15mm inside trim. Design letterheads, envelopes, and compliment slips as one consistent system — same fonts, colors, and logo placement.
Letterheads: The Setup
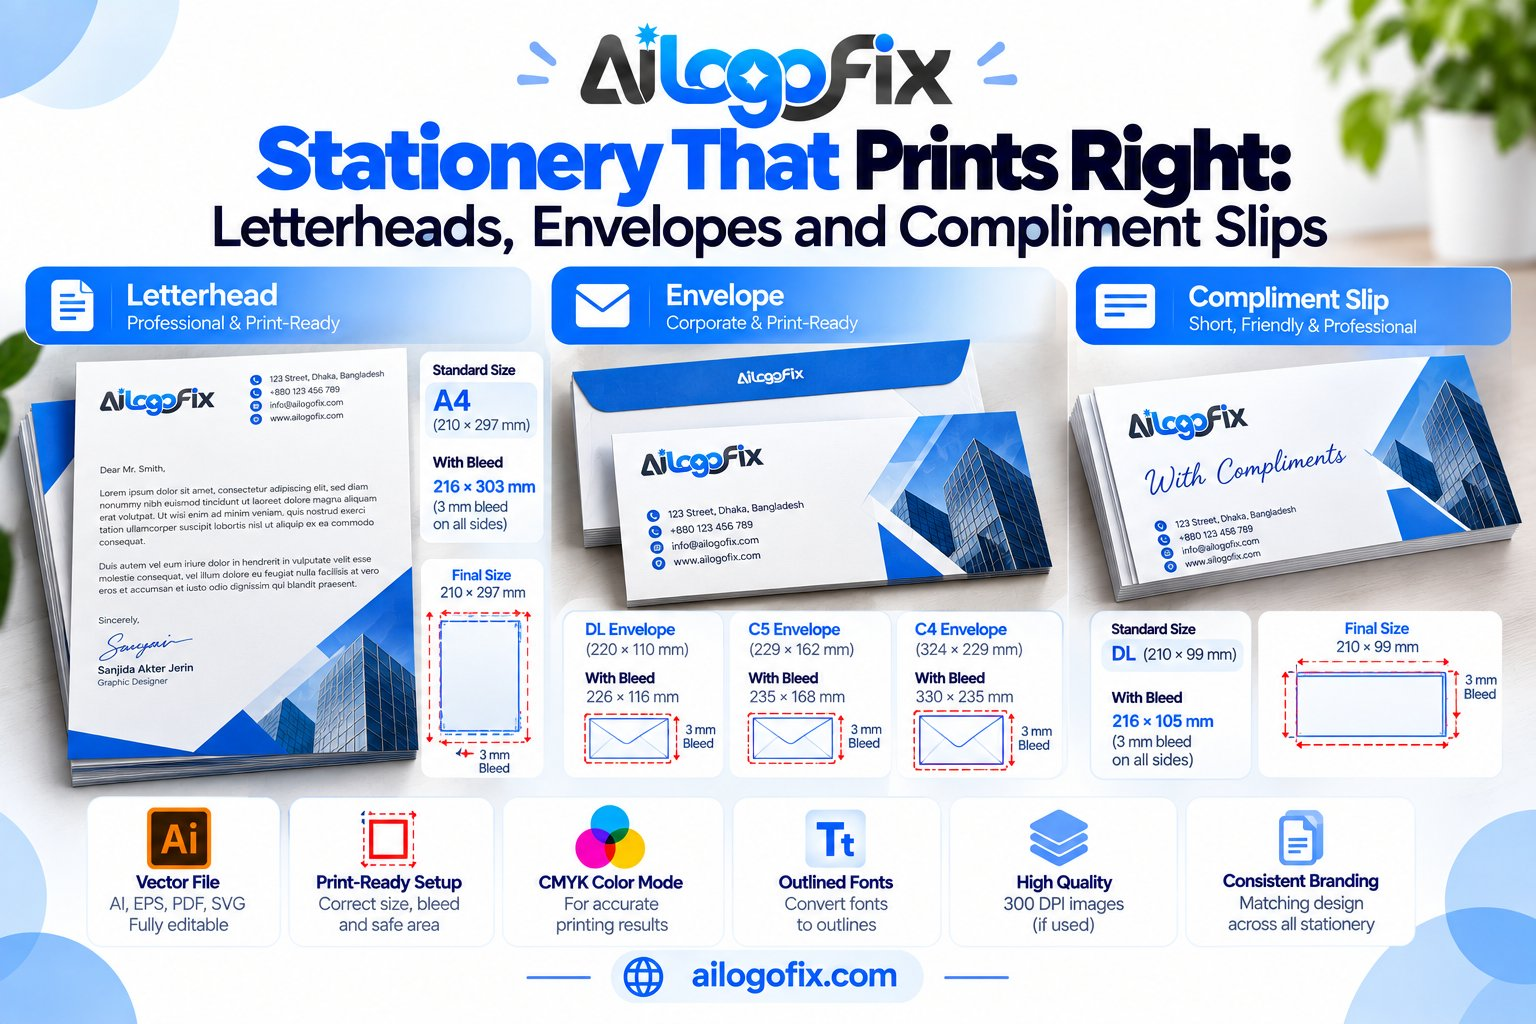
Size: A4 (210 × 297mm) or US Letter (8.5 × 11 in), plus 3mm bleed. Margins: Keep all content 10–15mm inside trim — letterheads need more air than flyers. Header: Logo (vector) top-left or centered, contact line in small clean type. Footer: Registration details, addresses, page numbers on multi-page letters.
Design the letterhead as a template with generous white space for body text — the letter’s content is the star. Export as print-ready PDF; also keep an editable Word/Google Docs version with the header/footer locked for daily use.
Envelopes: The Tricky One
Envelopes print differently: they’re printed flat before folding (or fed through specialized envelope printers). Key points for stationery printing on envelopes:
Standard sizes: DL (110 × 220mm, fits A4 tri-folded), C5 (162 × 229mm, fits A4 unfolded), C4 (229 × 324mm).
Bleed: Still 3mm, but confirm with your printer — envelope stocks and feeds vary.
Keep it simple: Logo + return address is usually enough. Heavy ink coverage on envelopes causes feeding and drying issues.
Compliment Slips: Small but Mighty
Compliment slips (typically DL or A6) ride along with documents and samples. Same setup discipline: exact size + bleed, 300 DPI, CMYK, vector logo. Include: logo, “With compliments,” name/title line, contact details. They’re cheap to print — never skip them.
Consistency Across the System
Stationery works as a system: the letterhead, envelope, compliment slip, and business card should share fonts, color values (same CMYK builds), logo size relationships, and layout rhythm. Define these once in a mini style guide and every piece reinforces the brand. See what goes in a brand style guide (publishing soon).
Paper Choice Matters
Weight: 100–120gsm for letterheads (feels substantial, feeds reliably), 120gsm+ for compliment slips. Finish: Uncoated for writability (signatures, notes); silk for color richness. Color: Bright white vs off-white changes how your brand colors read — proof on the actual stock.
FAQs
What size is a standard letterhead?
A4 (210 × 297mm) or US Letter (8.5 × 11 in), plus 3mm bleed, at 300 DPI in CMYK.
How much bleed for stationery?
3mm standard. Envelopes may vary — confirm with your printer.
Should letterheads be printed or digital templates?
Both: print a run for formal correspondence, and keep a matching Word/Docs template for everyday use.
What weight paper for letterheads?
100–120gsm is the sweet spot — professional feel without printer feed issues.
Can I use my logo on envelopes?
Yes — vector logo, simple placement, light ink coverage. Heavy solids on envelopes cause problems.
Do I need matching stationery and business cards?
Yes — they’re one visual system. Same fonts, colors, and logo treatment across everything paper.
The bottom line: Stationery printing is about precision and consistency. Exact sizes, proper bleed, one coherent system — and every sheet that leaves your office sells your brand.
Stationery Printing FAQs
Got questions about stationery printing? Here are the answers print shops wish every client knew before sending files.
What bleed do I need for stationery printing?
Use 3mm bleed on all sides for letterheads, compliment slips, and most stationery printing. Envelopes also typically need 3mm, but confirm with your printer because envelope stocks feed differently. Bleed gives the trim blade room for error so you never see white edges.
What DPI should stationery printing files be?
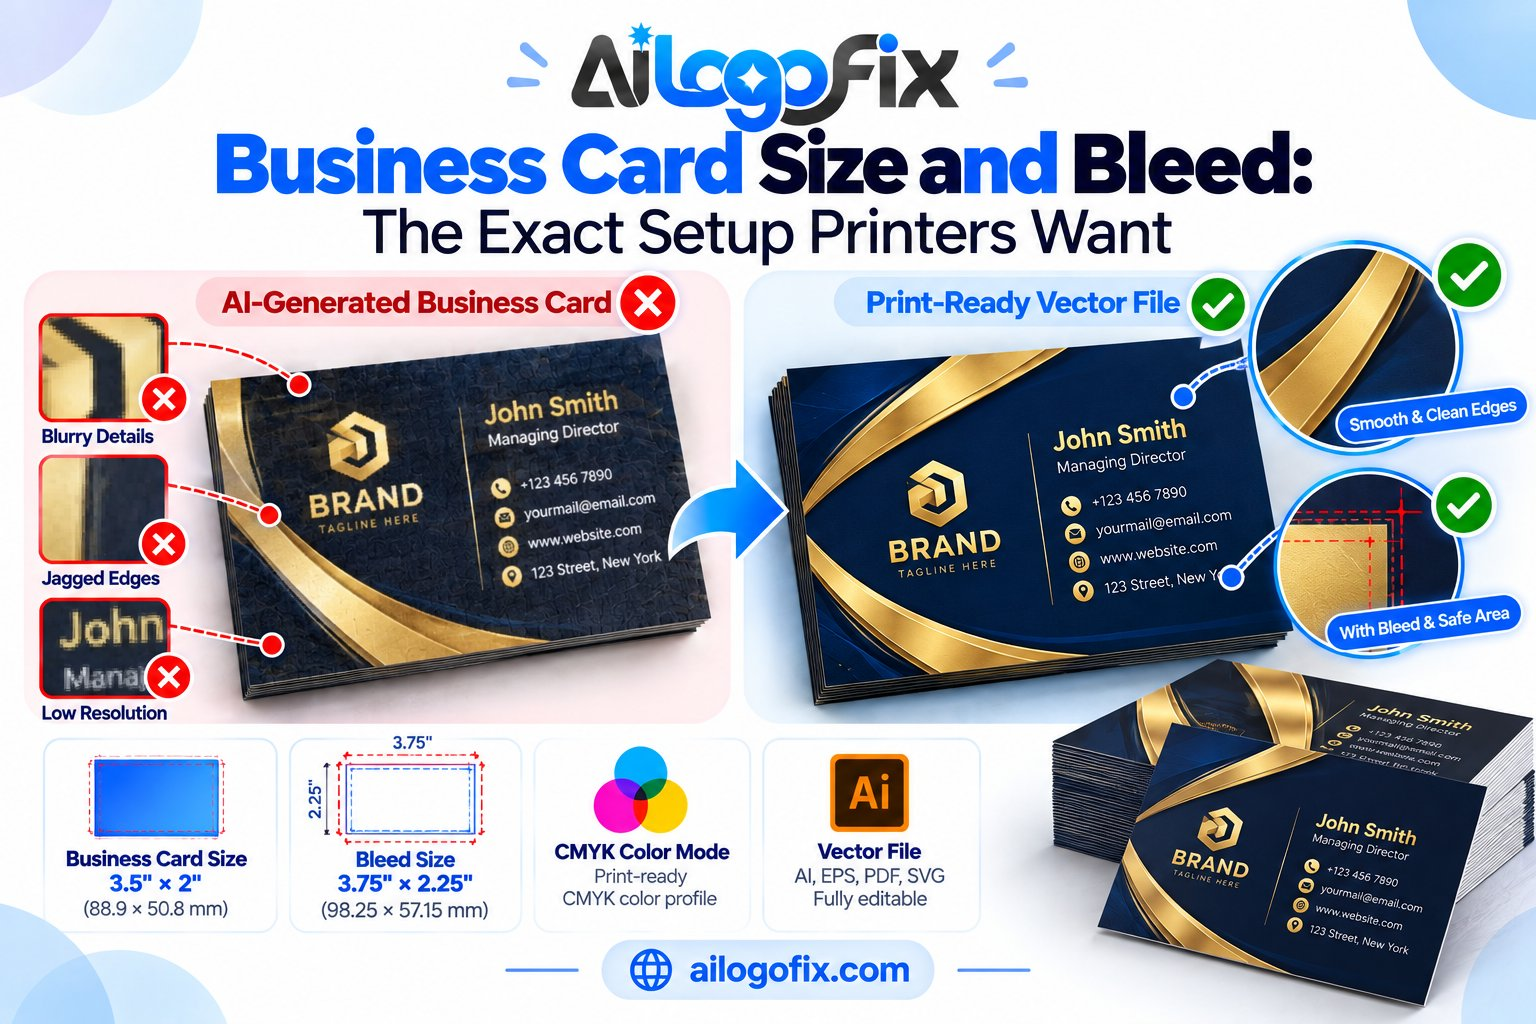
Set raster elements to 300 DPI at final size for crisp stationery printing. Vector logos and text stay sharp at any resolution, which is why your logo should always be vector in stationery printing files. Anything below 200 DPI risks visibly soft text.
Should stationery printing files be CMYK or RGB?
Always CMYK for stationery printing. RGB files get auto-converted by the RIP software, often shifting your brand colors. Define brand colors with CMYK builds (or Pantone references) from the start so your stationery printing matches across reprints.
Can I use the same logo file for stationery printing and web?
Not quite. Stationery printing needs a vector logo (AI, EPS, or PDF) in CMYK, while web uses RGB PNG or SVG. Keep both versions in your brand folder. Sending a web PNG to a printer is the most common cause of blurry letterheads.
How do I keep letterhead, envelope, and compliment slip consistent?
Treat stationery printing as one system. Use identical fonts, the same CMYK color builds, one logo version, and matching layout rhythm across every piece. A one-page mini style guide prevents drift when different designers touch the files over the years.
What paper works best for stationery printing?
For stationery printing, 100-120gsm uncoated paper is the classic choice for letterheads — it feels substantial and takes ink from pens well. Compliment slips can go heavier (up to 160gsm). Avoid coated stock if people need to write on the piece.
7 Costly Stationery Printing Mistakes
Most stationery printing problems are preventable. Watch for these before you approve a proof.
1. RGB files sent to press. The number one stationery printing error. Your bright screen blues turn dull purple in CMYK. Convert and soft-proof before export.
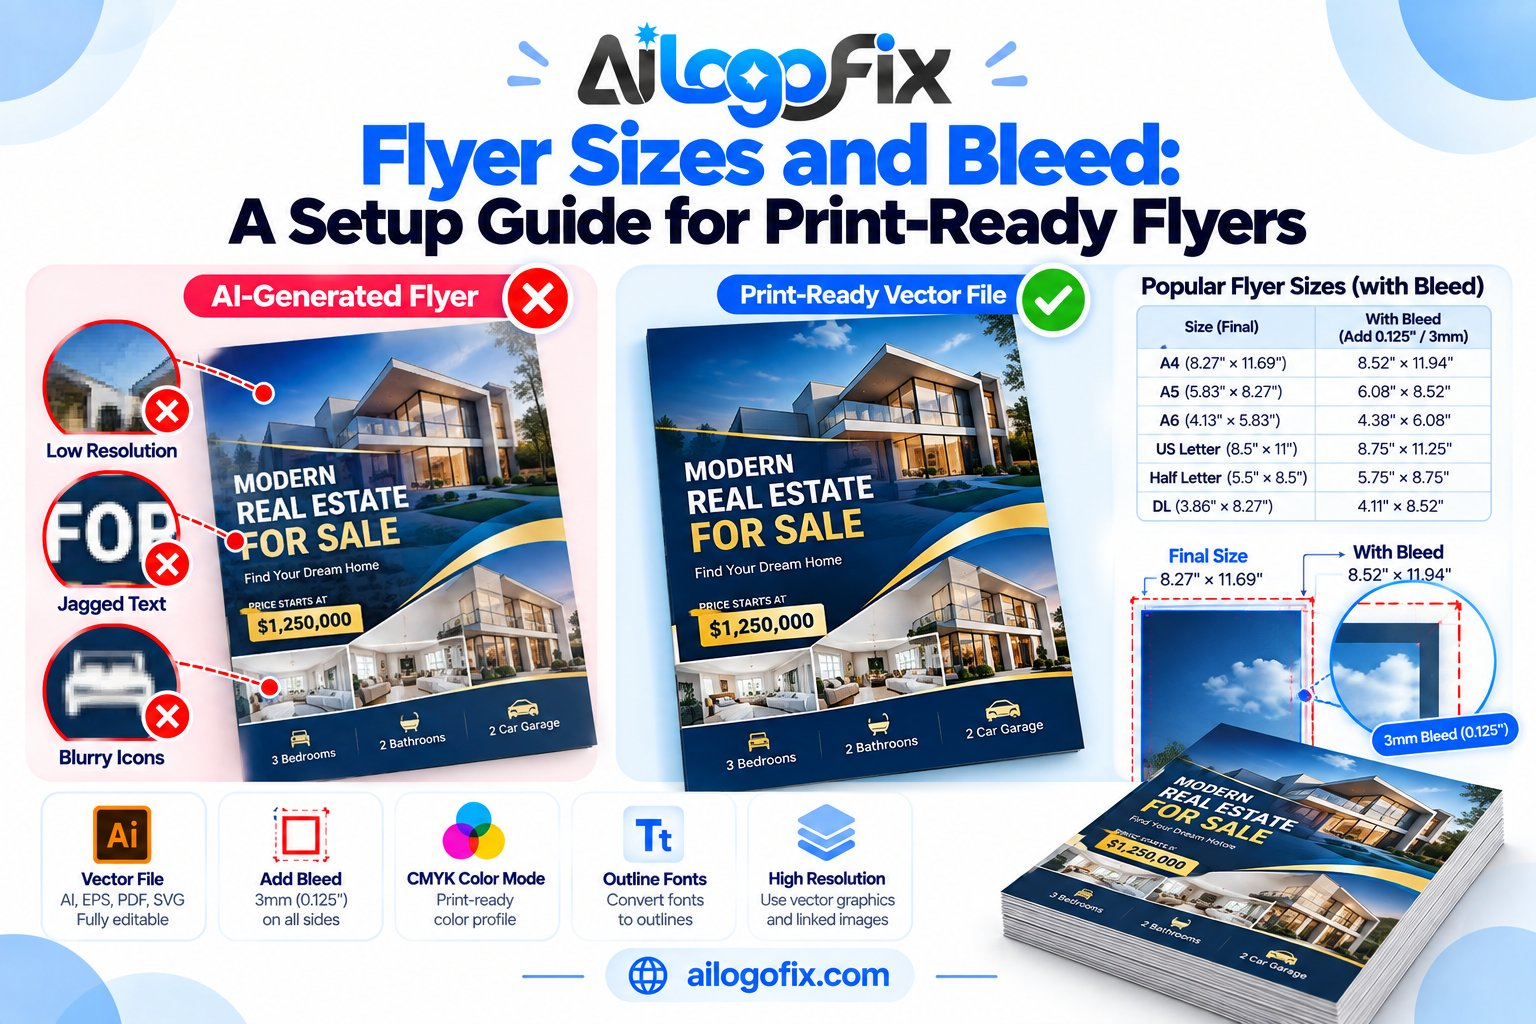
2. No bleed. Designing exactly to trim size guarantees white slivers after cutting. Every stationery printing file needs that 3mm safety zone.
3. Low-resolution logos. A 72 DPI web logo on a letterhead prints soft and amateur. Stationery printing demands vector logos — convert yours to vector if you only have a PNG.
4. Text too close to the edge. Keep live text 10-15mm inside trim. Guillotine cutters drift slightly; tight text gets clipped.
5. Wrong paper for the job. Heavy ink coverage on cheap uncoated stock looks muddy. Match the design density to the paper — or upgrade the paper.
6. Inconsistent color builds. The letterhead uses one CMYK blue, the envelope another. Define brand colors once; reference them in every stationery printing file.
7. Skipping the hard proof. Screen proofs lie about color. For important stationery printing runs, pay for a physical proof — it is cheaper than reprinting 5,000 letterheads.
Paper sizes follow international standards — see the ISO 216 paper size standard for exact A4, DL, and C-series dimensions used in stationery printing worldwide.
Stationery Printing Preflight Checklist
Run every stationery printing file through this checklist before sending it to press.
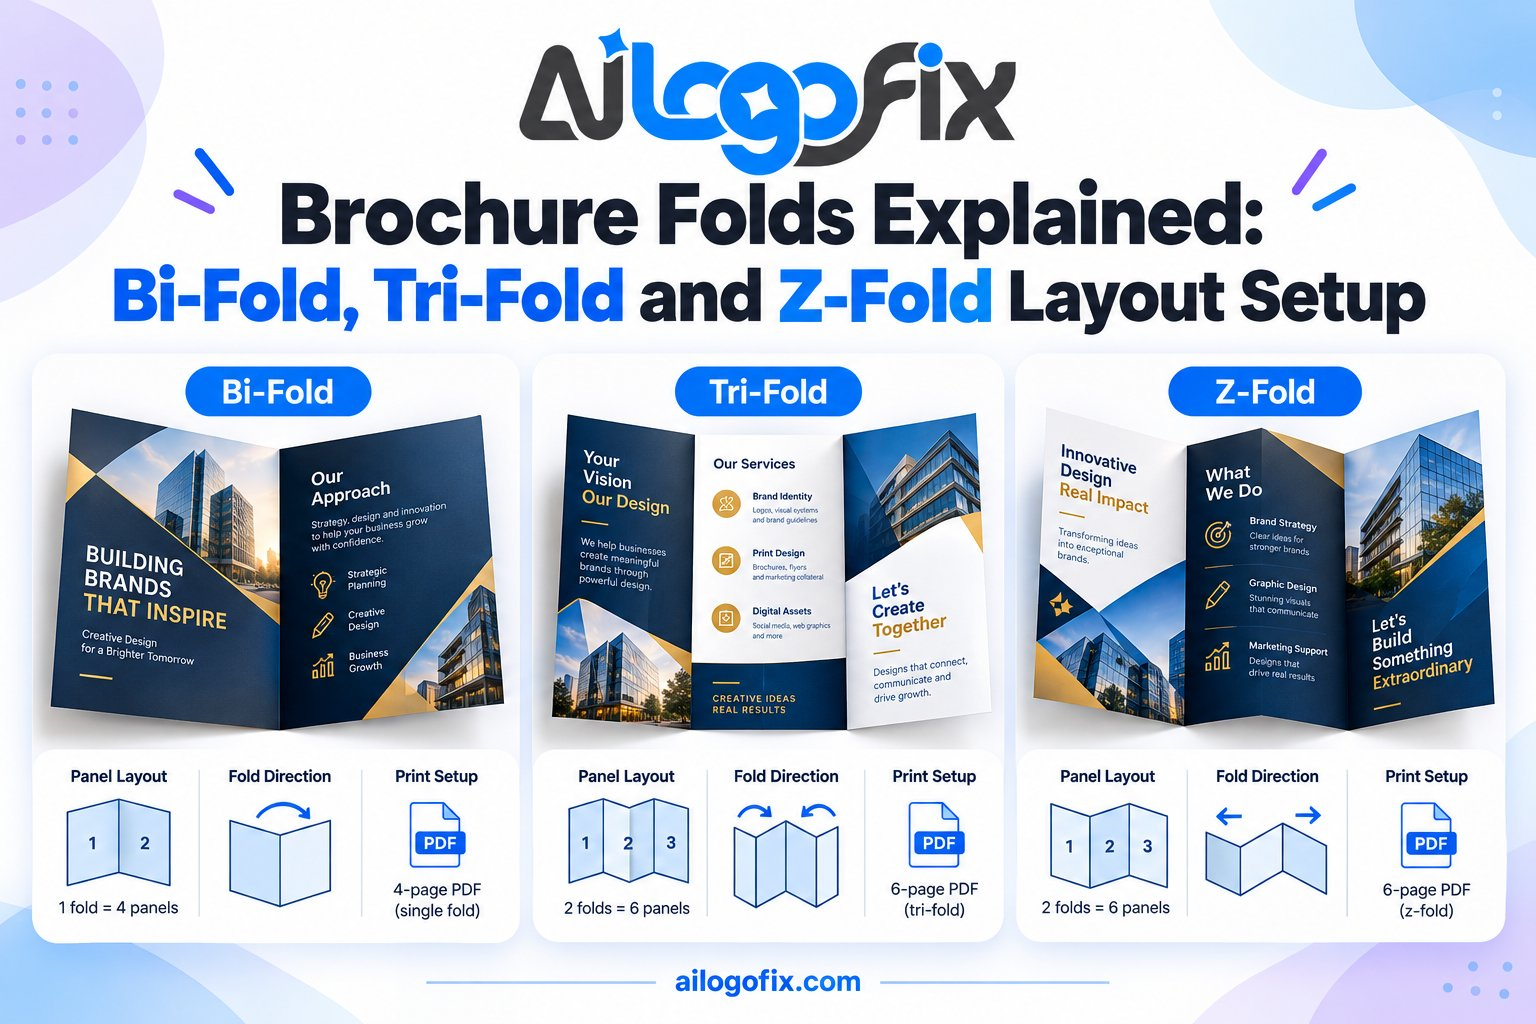
- Document size matches final trim + 3mm bleed on all sides
- All raster images 300 DPI at placed size
- Color mode CMYK throughout (no RGB stragglers)
- Logo is vector, not an embedded web PNG
- Fonts embedded or outlined
- Text 10-15mm inside trim edge
- Brand colors use consistent CMYK builds
- Exported as print-ready PDF (PDF/X-1a or PDF/X-4)
Follow this list and your stationery printing will come back from press looking exactly like your screen — or better. When in doubt, ask your printer to preflight the PDF; most do it free and catch issues in minutes.
Pro Tips for Flawless Stationery Printing
Small refinements separate decent stationery printing from exceptional stationery printing.
Design for the worst printer, not the best. Your files might run on a high-end press or an office copier. Clean vector art, generous margins, and standard fonts survive both.
Keep a print archive. Save every approved stationery printing PDF with its native files, fonts, and color notes. Reprints take minutes instead of days.
Test envelopes first. Envelope stationery printing is the most failure-prone piece. Run a short test batch before committing to thousands.
Understanding how DPI and resolution work helps you judge whether an image is truly print-ready or just looks fine on screen.
How to Choose a Stationery Printer
Not all printers handle stationery printing equally well. The right partner makes the difference between crisp, color-accurate stationery and a disappointing reprint.
Ask about their preflight process. Good printers check your PDF before it hits press — catching missing bleed, RGB images, and font issues. If a printer accepts files with zero questions, be nervous.
Request paper samples. Paper choice defines how premium your stationery feels. Reputable stationery printing shops mail sample packs with different weights and finishes. Feel them, write on them, hold them to light.
Compare proofing options. Digital PDF proofs are standard and free. For color-critical stationery printing, ask about hard proofs — a physical sheet from the actual press. It costs extra but eliminates surprises.
Check turnaround realistically. Standard stationery printing takes 3-5 working days plus shipping. Anyone promising same-day litho printing is likely cutting corners on drying time or quality checks.
Read reviews about color accuracy. The most common complaint in stationery printing is color shift. Look for printers reviewers praise specifically for matching brand colors.
Start with a small run. Before ordering 10,000 letterheads, print 250. Live with them for a week. Check how the paper feels, how pens write on it, how the colors look under office lighting. Then commit.
Stationery Printing Costs Explained
Stationery printing pricing follows predictable patterns. Understanding them helps you budget accurately and spot overpriced quotes.
Setup vs. unit cost. Litho stationery printing has fixed setup costs (plates, makeready) plus a small per-unit cost. That is why 500 letterheads might cost $80 but 5,000 cost $200 — the setup dominates small runs.
Digital vs. litho. For runs under ~500 pieces, digital stationery printing is usually cheaper with no setup fees. Above that, litho wins on unit price and color fidelity. Ask your printer for the crossover point.
Paper is the variable. Standard 120gsm uncoated might add little to the base price, while premium cotton or textured stocks can double it. For most stationery printing, the mid-range house stock hits the sweet spot of feel and value.
Finishing adds up. Foil stamping, embossing, and edge painting transform stationery printing from ordinary to luxurious — at $100+ setup per finish. Reserve special finishes for pieces clients keep, like business cards and compliment slips.
Design costs dwarf print costs. A proper stationery printing system (letterhead, envelope, compliment slip, business card) designed well pays for itself in perceived professionalism. Skimping on design to save $200 while spending $800 on print is backwards.
Get three quotes for any significant stationery printing run, and compare them line by line — paper spec, proofing, finishing, and delivery. The cheapest quote often omits something the others include.
Stationery in the Digital Age
Some predicted paper stationery would die with email. Instead, quality printed stationery became a differentiator — precisely because inboxes are crowded and desks are not.
Tactile impact. A heavyweight letterhead or textured compliment slip creates a sensory impression no PDF can match. Recipients keep well-made pieces; they delete emails.
The hybrid workflow. Modern businesses run both: digital templates for speed, printed stationery for moments that matter — proposals, thank-yous, contracts, premium packaging inserts. Design both from the same brand system so they feel like one company.
Sustainability sells. Clients increasingly ask about recycled stocks and vegetable-based inks. FSC-certified papers and carbon-neutral printers are widely available now, often at minimal premium. Mention your choices subtly — a small recycled logo on the back signals values without preaching.
Personalization at scale. Digital presses make short personalized runs affordable. Variable-data printing puts each recipient’s name on the letterhead or slip — a tactic that lifts response rates dramatically for direct mail.
Keep digital masters. Even as you invest in print, maintain pixel-perfect digital versions of every piece. Email signatures, PDF letterheads, and virtual backgrounds should echo the printed system.
The businesses that stand out treat stationery as brand theater: every touchpoint, physical or digital, reinforcing the same story. Done well, it is among the highest-ROI brand investments a small business can make.
When to Hire a Designer for Your Stationery
Templates and DIY tools handle basic stationery, but certain situations call for a professional designer.
Your logo only exists as a JPG. This is the most common reason stationery projects stall. A pixel-based logo cannot produce crisp print results. A designer converts it to true vector, cleans up the shapes, and delivers print-ready files – the foundation everything else builds on.
Brand inconsistency is creeping in. If your letterhead, business card, and envelope look like they came from three different companies, a designer unifies them into one coherent system with locked color builds, typography rules, and spacing standards.
You are rebranding. New logo means every stationery piece must be rebuilt: letterhead, envelopes, slips, cards, email templates. Doing this piecemeal guarantees inconsistency; a designer rebuilds the full system at once.
Special finishes are involved. Foil, embossing, and spot UV require precise file setup – separate layers, vector masks, and printer-specific specs. Get it wrong and an expensive finish becomes expensive waste.
What to provide your designer: your vector logo (or the best version you have), brand colors and fonts if defined, examples of stationery you admire, paper preferences, quantities, and your printer’s spec sheet. The more you provide, the faster the turnaround.
A well-designed stationery system pays for itself every time a proposal lands on a client’s desk. If your current pieces feel amateur, that is your sign – talk to our design team about a stationery refresh.
Quick Recap
Great stationery printing comes down to a handful of fundamentals done consistently: exact sizes with 3mm bleed, 300 DPI images, CMYK color, vector logos, safe margins, and the right paper. Nail those, and every piece – from letterheads to compliment slips – will look sharp and professional.
Build your stationery as a unified system, not isolated pieces. Keep a print archive of approved files. Proof carefully, choose your printer wisely, and do not be afraid to hire a designer when the stakes are high. Your stationery represents your brand every time it lands on a desk – make it count.
Stationery Printing Glossary
Talk to any printer with confidence. Key terms you will hear:
Bleed: Extra printed area beyond the trim edge (usually 3mm) that gets cut off, preventing white edges.
Trim: The final cut size of the printed piece after bleed is removed.
Safe zone / quiet zone: The inner margin (10-15mm) where all important text and logos must sit.
GSM: Grams per square meter – the standard measure of paper weight. Higher GSM means thicker paper.
CMYK: The four process ink colors (Cyan, Magenta, Yellow, Key/Black) used in full-color printing.
Spot color / Pantone: A premixed ink for exact brand color matching, printed as an additional plate.
DPI: Dots per inch – resolution measure. 300 DPI is the standard for quality print.
Vector: Artwork defined by mathematical paths, infinitely scalable without quality loss.
Preflight: The technical check of print files for errors before they go to press.
Proof: A test print (digital or physical) for approving color and layout before the full run.
Finishing: Post-press processes like folding, foil stamping, embossing, or edge painting.
Makeready: Press setup time and materials – the fixed cost that makes short runs expensive per unit.