
Turn an AI-Generated Brochure Into Production-Ready Artwork
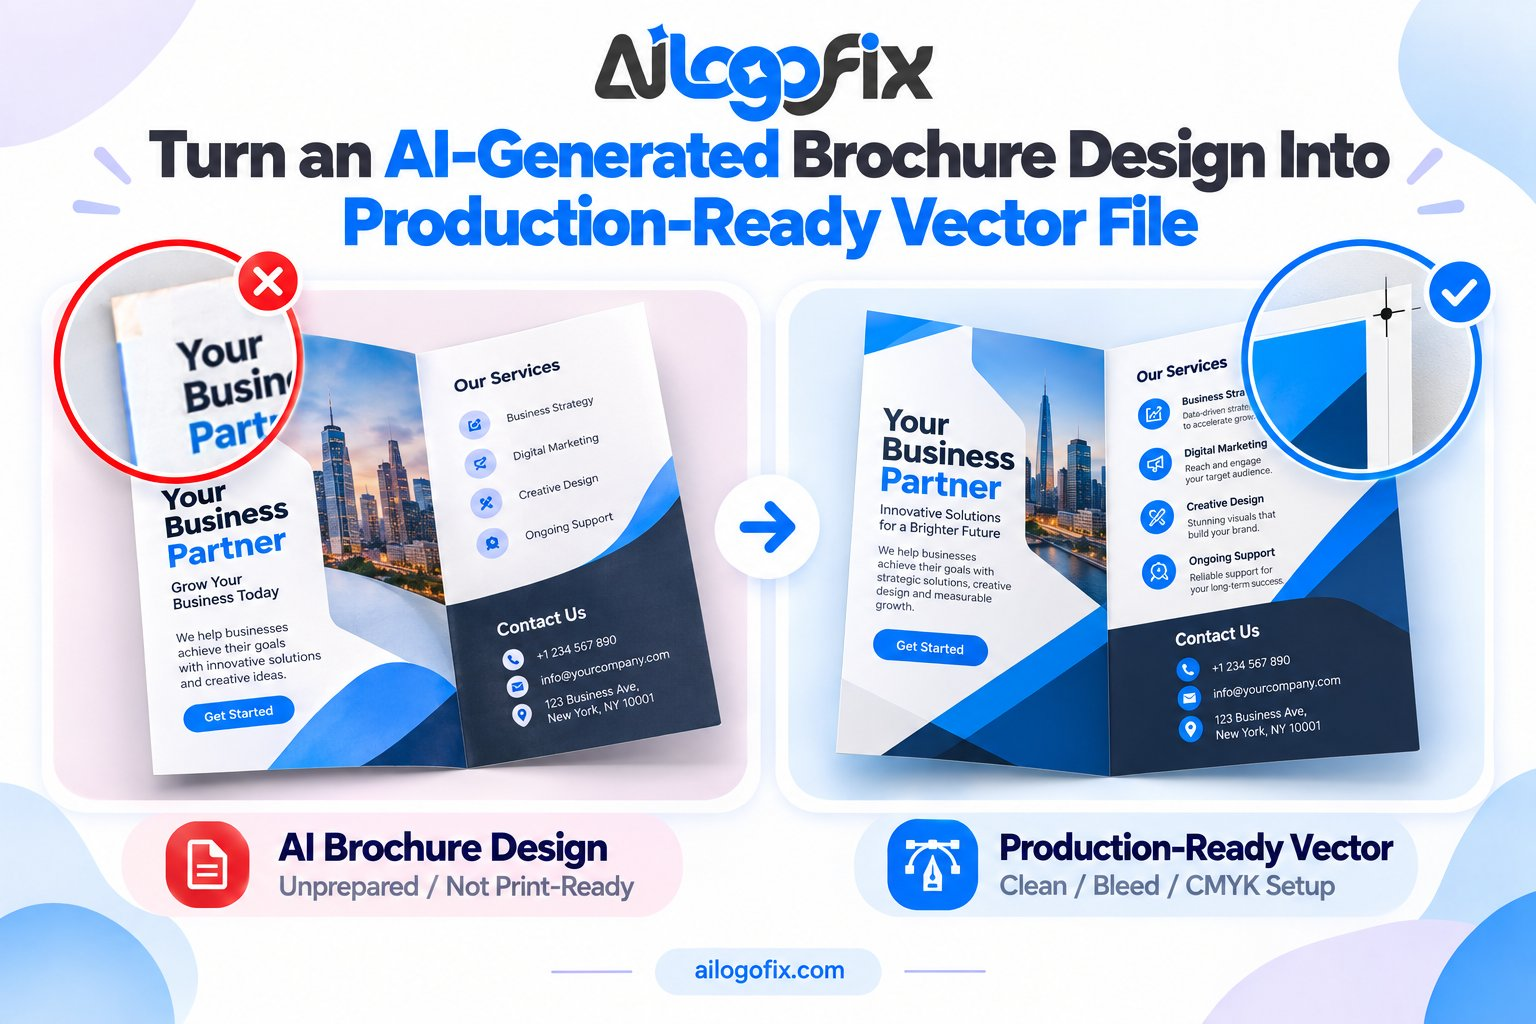
AI image generators produce gorgeous brochure mockups — but a mockup is not a printable brochure. Real brochures have folds, panels, margins, and two sides that must align perfectly when folded. An AI-generated brochure gives you the design vision; this guide gives you the production workflow to make it real.
In This Guide
- Why Brochures Are Harder Than Flyers
- Step 1: Choose Your Fold and Panel Sizes
- Step 2: Map Content to Panels
- Step 3: Rebuild at Print Size With Bleed
- Step 4: Retype All Text, Fix the Logo
- Step 5: Export Print-Ready
- FAQs
- AI Brochure to Print: Complete FAQ
- 7 AI Brochure to Print Mistakes (and How to Fix Each)
- Deep Dive: Mapping Content to Brochure Panels
- When to Hire a Designer for AI Brochure to Print
- AI Brochure to Print Glossary
Quick answer: Rebuild the AI-generated brochure as a proper multi-panel layout at exact trim size with bleed, set up fold panels correctly, retype all text, convert to CMYK, place a vector logo, and export a print-ready PDF. The AI image is your art direction — not your print file.
Why Brochures Are Harder Than Flyers
A flyer is one flat page. A brochure folds — which means panels, and panels have rules. In a tri-fold, the inside flap panel is slightly narrower (it folds in). Text must not cross fold lines. Front and back must align. Get any of this wrong and the printed piece looks amateur no matter how pretty the AI mockup was.
Like flyers, the AI output is RGB, low-resolution, with flattened gibberish-prone text and no bleed. All of it must be rebuilt. See our AI flyer to print-ready workflow for the shared fundamentals (resolution, CMYK, bleed).
Step 1: Choose Your Fold and Panel Sizes
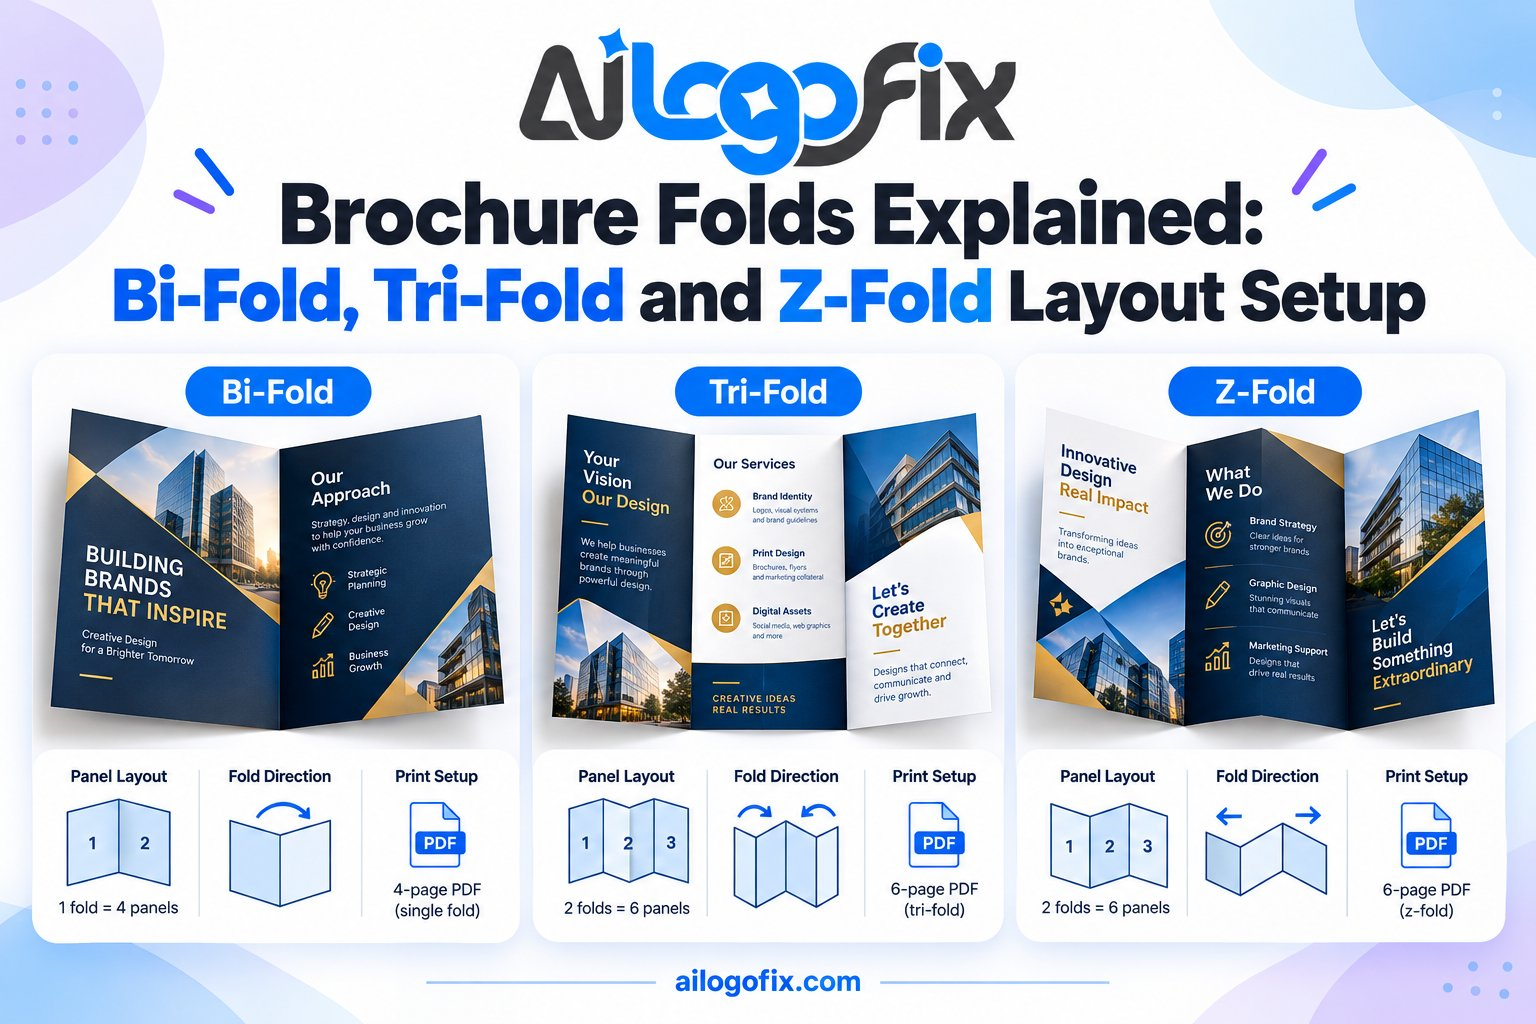
Common brochure folds and their flat (unfolded) sizes at A4:
Bi-fold (4 panels): folds in half — two equal halves. Simple, elegant.
Tri-fold (6 panels): the classic. Note: the fold-in panel is ~2mm narrower than the others so it nests flat.
Z-fold (6 panels): folds in a zigzag — all panels equal width, opens like an accordion.
Set up your document at the flat size (e.g. A4 landscape for a tri-fold) plus 3mm bleed, 300 DPI, CMYK. Mark fold lines with guides — never place text across them.
Step 2: Map Content to Panels
Before designing, assign content to panels on paper:
Front panel: cover — headline, hero image, logo. This is what people see first.
Inside panels: the story — features, benefits, photos, testimonials.
Back panel: contact info, map, call to action, QR code.
Fold-in flap (tri-fold): teaser content or a signup form — the panel revealed first when opening.
Use the AI-generated brochure as art direction for each panel’s look, then rebuild every panel cleanly at print size.
Step 3: Rebuild at Print Size With Bleed
Recreate the layout panel by panel — do not stretch the AI image across the document. Extend backgrounds into the 3mm bleed. Keep text and key elements 5mm+ from trim edges and at least 5mm from fold lines (text sitting on a fold cracks and looks terrible).
Step 4: Retype All Text, Fix the Logo
Retype every word as editable text — headlines, body copy, contact details, prices. AI brochure text is especially unreliable across six panels. Proofread twice. Place your real vector logo; if you only have pixels, get it rebuilt as a vector first.
Step 5: Export Print-Ready
Export a multi-page (or single flat) print-ready PDF: CMYK, 300 DPI, 3mm bleed, crop marks, embedded/outlined fonts. Confirm with your printer whether they want the flat layout or imposed pages — most prefer the flat with fold marks indicated.
FAQs
Can I print an AI-generated brochure directly?
No. The AI output has no fold structure, no bleed, RGB color, low resolution, and unreliable text. It is art direction — the production file must be rebuilt.
What is the standard tri-fold brochure size?
A4 flat (297 × 210mm) folding to DL-ish panels, or US Letter flat (11 × 8.5 in). Always confirm with your printer.
Why is one tri-fold panel narrower?
The inside flap folds into the brochure, so it must be ~2mm narrower to nest flat without buckling.
How much bleed for brochures?
3mm (0.125 in) on all outer edges, same as flyers.
Should text cross fold lines?
Never. Keep text at least 5mm from folds — ink cracks on folds and readability suffers.
What file do I send the printer?
A print-ready PDF (CMYK, 300 DPI, bleed, crop marks, embedded fonts), ideally as the flat layout with folds marked.
The bottom line: An AI-generated brochure is a beautiful promise. Folds, panels, bleed, and real type are what keep it. Rebuild with structure, and the printed piece will match the mockup’s promise.
AI Brochure to Print: Complete FAQ
Every question designers ask about the ai brochure to print workflow, answered in depth. Brochures add folding, panel order, and multi-page imposition to the usual print challenges.
Can an AI image generator make a printable brochure?
It can make a beautiful picture of a brochure, not a printable one. AI output is a flat RGB image with no fold awareness, no panel gutters, no bleed, and fake text. The ai brochure to print workflow rebuilds that concept as a real multi-panel document: correct fold style, precise panel widths, CMYK color, 300 DPI images, live text, and a vector logo. The AI gives you the creative direction; the rebuild gives you something a press can fold.
Which fold should I choose for my brochure?
Tri-fold is the default for general marketing, bi-fold suits premium pieces with large imagery, and Z-fold works for step-by-step content. Gate folds and roll folds handle six or more panels. Your ai brochure to print plan must lock the fold before designing, because each fold has different panel widths. In a tri-fold, the inside flap panel is slightly narrower (typically 2 to 3mm) so it folds flat without buckling. Designing for the wrong fold means reworking the entire layout.
How do panel sizes work in a tri-fold brochure?
On a letter-size tri-fold, the two outer panels are full width (about 99mm each on the metric equivalent) while the fold-in panel is narrower by 2 to 3mm. Get this wrong and the brochure will not close flat. The ai brochure to print document setup must use these exact panel widths with fold guides marked, plus 3mm bleed on all outer edges. Never place critical text across a fold line; keep headlines and logos centered within their own panels.
How do I handle text across brochure panels?
Retype everything as live text, then map content to panels deliberately. Each panel should work as a mini-layout with its own headline and purpose: front panel hooks, inside panels inform, back panel converts with contact details. The ai brochure to print text rule is strict because AI lettering is gibberish. Set body copy at 9 to 10pt minimum, keep 10mm safe margins from trims and folds, and outline or embed all fonts before export.
What resolution do brochure images need?
300 DPI at final placed size across every panel. Brochures are held close and read carefully, so soft images are immediately obvious. AI-generated imagery usually needs upscaling plus manual cleanup, and every photo should be checked for effective DPI after placement. The ai brochure to print image standard has no shortcuts: replace anything under 250 DPI effective, and use vector graphics for logos, icons, and charts. Readers judge print quality subconsciously, and blurry panels kill trust.
Should brochures use CMYK or spot colors?
CMYK for full-color photography and general work; add Pantone spot colors when brand accuracy is critical or you want a metallic or fluorescent effect. Spot colors cost more per color but reproduce logos and brand elements with precision CMYK cannot match. The ai brochure to print color decision affects budget, so confirm with the printer early. Either way, convert deliberately with the printer’s ICC profile and soft-proof before export. Standard paper size standards determine your flat sheet dimensions before folding.
How do I export a print-ready brochure PDF?
Export a single PDF with pages in reading order (not printer spreads; the imposition software handles that), PDF/X-1a or PDF/X-4, with 3mm bleed and crop marks. Set the document to the flat unfolded size with fold guides marked, or supply panels as ordered pages exactly as your printer requests. The ai brochure to print export must include embedded or outlined fonts, CMYK images at 300 DPI, and no RGB stragglers. Always confirm the printer’s preferred file setup before exporting; every shop has its own imposition workflow.
What paper works best for brochures?
150 to 250gsm silk or gloss for most marketing brochures; 250 to 300gsm for premium pieces. Heavier stock folds poorly without scoring, so discuss creasing with the printer for anything above 200gsm. Uncoated stock suits eco brands and writable forms but dulls photography slightly. The ai brochure to print paper choice affects both feel and fold quality, so request printed samples on your shortlisted stocks before committing to a large run.
How much does printing AI-designed brochures cost?
Printing costs depend on quantity, size, stock, and finishes, not on whether the design started in AI. Digital printing suits runs under 500 copies; offset becomes economical above that. A typical tri-fold run of 1,000 copies on 170gsm silk costs a fraction of the design time invested. The ai brochure to print preparation is where the real cost sits: either your hours rebuilding the file or a designer’s fee. Get print quotes early, because quantity breaks and stock choices affect the budget more than most beginners expect.
7 AI Brochure to Print Mistakes (and How to Fix Each)
Brochures multiply every print mistake across panels and folds. These ai brochure to print errors are the ones professionals see most.
1. Designing without a fold plan. A flat design that ignores folds becomes a jigsaw puzzle at the bindery. Fix: choose the fold first, set exact panel widths with guides, and design each panel as its own unit within the ai brochure to print document.
2. Equal panel widths on tri-folds. The fold-in panel must be narrower or the brochure buckles. Fix: shave 2 to 3mm off the inside flap panel in your document setup.
3. Text crossing fold lines. Headlines that straddle a fold look broken after creasing. Fix: keep all text and logos centered in their panels with 10mm clearance from every fold in the ai brochure to print layout.
4. Wrong panel order. Content mapped to panels in reading order instead of flat-sheet order confuses the fold. Fix: sketch the flat layout on paper first, numbering panels as they appear unfolded, then build the ai brochure to print file to match.
5. Keeping AI text. Gibberish lettering across six panels is six times the embarrassment. Fix: retype every word as live text with proper hierarchy per panel.
6. Low-resolution panel images. One soft photo ruins the whole piece. Fix: verify 300 DPI effective on every placed image. Replace or upscale anything below standard before export.
7. No printer consultation. Every shop imposes and folds differently. Fix: call the printer before designing. Ten minutes of questions about their ai brochure to print file preferences prevents a full rebuild later.
Deep Dive: Mapping Content to Brochure Panels
The hardest part of the ai brochure to print workflow is not technical; it is editorial. Six panels, one folded journey, and every panel must earn its place. Here is how professionals think about panel mapping.
Think in spreads, then panels. Readers experience a brochure as three moments: the cover (front panel), the reveal (inside spread), and the takeaway (back panel). Design each moment first, then divide into panels. The cover needs one strong image and a headline that creates curiosity. The inside spread carries the argument: benefits, proof, and details in a natural reading sequence. The back panel closes with contact details and a call to action. When your ai brochure to print content follows this arc, the fold becomes a storytelling device instead of a constraint.
Respect the fold-in panel. In a tri-fold, the narrow inside flap is the panel readers see last. Use it for secondary content: testimonials, a FAQ, pricing details, or a signup form. Never put your main message there. In a Z-fold, all panels are equal citizens, which suits sequential storytelling like process steps or timelines. Matching content weight to panel prominence is the core skill of ai brochure to print layout.
Keep the back panel self-sufficient. Brochures often sit face-down on counters, so the back panel works as a second cover. It should carry your logo, a one-line value proposition, contact details, and a QR code. Someone who only ever sees the back should still know who you are and how to reach you.
Control the reading order with design. Numbered steps, consistent headline styles, and visual rhythm guide readers through panels in the intended sequence. Without these cues, readers jump randomly and miss the argument. The ai brochure to print layout uses hierarchy the way a writer uses paragraphs: to control pace and emphasis.
Prototype with paper. Before finalizing, print your layout at actual size, cut, fold, and read it as a stranger would. This physical test catches panel-order mistakes, awkward fold crossings, and type that is too small, in five minutes. No screen preview replaces holding the folded piece. Understanding how print resolution works helps you judge whether your images will survive this close inspection.
When to Hire a Designer for AI Brochure to Print
Brochures are the most complex common print product. Here is when the ai brochure to print rebuild belongs with a professional.
You have never set up folds before. Panel math, imposition, and creep (inner pages shifting in thick booklets) are genuine prepress skills. First-timers routinely produce files that fold wrong.
The brochure sells something expensive. Property, machinery, medical services, education. High-consideration purchases demand flawless presentation, and prospects handle the brochure while deciding.
You need multiple versions. Language variants, regional editions, or personalized runs multiply layout work. Designers build master files where versioning is systematic, not chaotic.
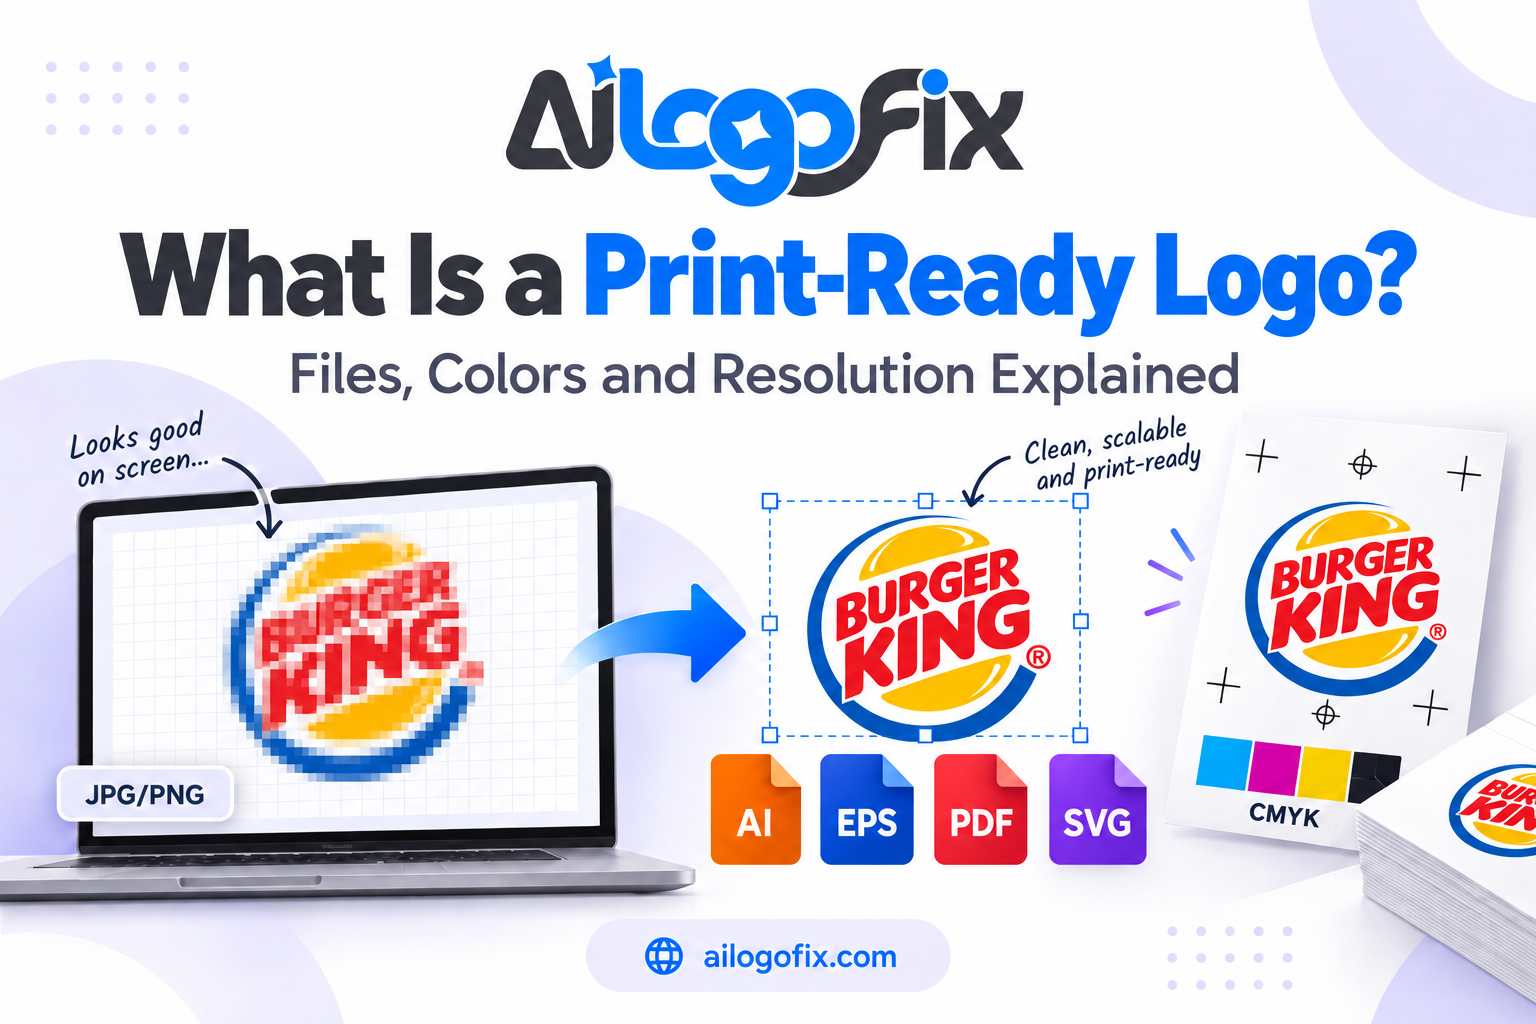
Your logo is not vector. A soft logo repeated across six panels is six times the damage. Get it converted to vector before the ai brochure to print layout starts.
The printer keeps asking questions you cannot answer. If terms like creep, imposition, and gripper margin draw blank stares, you need a designer who speaks printer fluently.
Need it done right? Message our design team with your AI brochure concept. We rebuild it as genuine production-ready artwork: correct folds, live text, CMYK color, vector logo, and a press-ready PDF.
AI Brochure to Print Glossary
Imposition: Arranging pages on the press sheet so they fold into correct order.
Creep: The outward shift of inner pages in thick folded pieces; compensated in layout.
Gutter: The inner margin area near folds and bindings.
Score: A crease pressed into heavy stock so it folds cleanly without cracking.
Self-cover: A brochure printed on a single paper stock throughout.
Plus cover: A brochure with a heavier cover stock than its inside pages.
Flat size: The unfolded dimensions of the printed sheet.
Finished size: The dimensions after folding.
Reader spreads: Pages arranged in reading order (what you design).
Printer spreads: Pages arranged for the press (what imposition software creates).
Bottom line: The ai brochure to print workflow is equal parts editorial planning and prepress discipline. Map content to panels with intent, respect the fold geometry, and export clean press-ready PDFs. Do that and your AI concept becomes a brochure that folds, reads, and sells exactly as designed.