
Vehicle Wrap Design Files: What Print Shops Need From You
A vehicle wrap turns a car, van, or truck into a moving billboard — but it’s also one of the most technically demanding print jobs. The design must survive complex curves, panel gaps, and installation stretching. Here’s what print shops need from your vehicle wrap artwork files.
In This Guide
- Start With the Vehicle Template
- Design for Curves and Panel Breaks
- Resolution, Scale and Color
- Text and Logos on Wraps
- What to Hand the Print Shop
- FAQs
- Vehicle Wrap Artwork FAQ: 8 Questions Answered
- 7 Vehicle Wrap Artwork Mistakes (and How to Fix Each)
- The Vehicle Wrap Production Pipeline
- Vehicle Wrap Artwork Preflight Checklist
- Pro Tips for Vehicle Wrap Artwork That Lasts
- When to Hire a Designer for Vehicle Wrap Artwork
- Vehicle Wrap Glossary
Quick answer: Vehicle wrap artwork needs: a vector-based design at 10–25% scale, the exact vehicle template, 100–150 DPI raster elements at final size, CMYK color, generous bleed for panel edges, and all text as outlines. Never submit a flat JPG and hope.
Start With the Vehicle Template
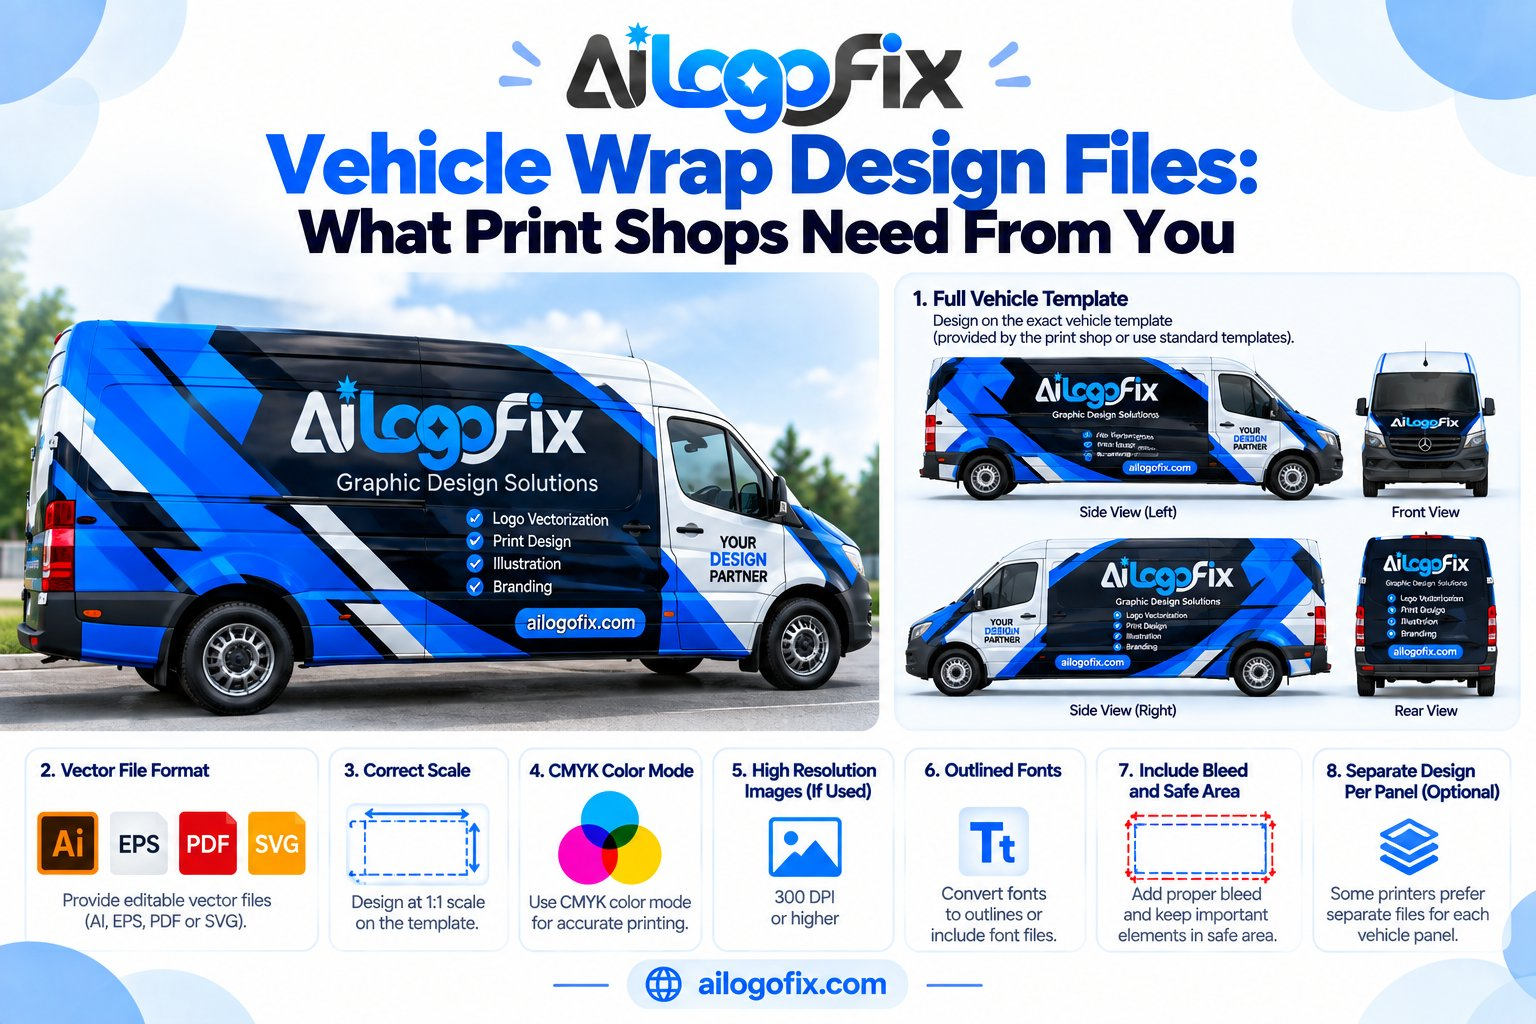
Every wrap starts with a vehicle template — a precise vector outline of the specific make, model, and year, showing panels, windows, door handles, and curves. Reputable wrap shops provide or sell these templates. Designing a vehicle wrap without the exact template is guesswork that fails at installation.
Design on the template at 10–25% scale, on separate layers: template (locked, non-printing), artwork, text. Clearly label the scale.
Design for Curves and Panel Breaks
A vehicle is not a flat billboard. Your vehicle wrap design must account for:
Panel gaps: Doors, hoods, and bumpers are separate printed panels. Keep critical text and logos away from panel breaks — a phone number split across a door gap is unreadable.
Curves and contours: Deep curves distort graphics during installation (vinyl stretches). Avoid perfect circles and precise geometric patterns on highly curved areas — they’ll warp.
Windows and hardware: Door handles, mirrors, lights, and windows interrupt the design. Work around them, not through them.
Resolution, Scale and Color
Scale: 10–25% of full size, vector text/logos throughout. Raster elements: 100–150 DPI at final size (viewing distance is meters, not centimeters). Color: CMYK; confirm the wrap printer’s profile. For fleet consistency across multiple vehicles, specify Pantone references. Background: RGB vs CMYK vs Pantone.
Text and Logos on Wraps
Text: Keep it big, bold, and minimal — a moving vehicle gives viewers 3 seconds. Convert all text to outlines. Logos: Must be vector — a pixelated logo on a van is visible from across the street. Only have a raster logo? Get it rebuilt as a vector before the wrap is designed.
What to Hand the Print Shop
A print-ready vehicle wrap file package: layered PDF or native files at declared scale, vehicle template on a separate non-printing layer, CMYK, fonts outlined, bleed per the shop’s spec (typically generous for wraps), and a mockup rendering showing the design on the vehicle. Include your contact info and the exact vehicle details (make, model, year, color).
FAQs
What file format for vehicle wraps?
Layered PDF (or the shop’s preferred native format) at 10–25% scale, CMYK, with the vehicle template included on a separate layer.
Can I wrap a vehicle with a JPG design?
No — wraps need scalable vector artwork on an exact vehicle template. A flat JPG can’t handle curves, panel breaks, or large-format scaling.
How much does vehicle wrap design cost?
Design and print/installation are usually quoted together by wrap shops. Get quotes from 2–3 specialist wrap installers — this isn’t a general print shop job.
How long do vehicle wraps last?
3–7 years depending on vinyl quality, climate, and care. Premium cast vinyl on a garaged vehicle lasts longest.
Will the wrap damage my paint?
Professionally installed quality vinyl protects paint and removes cleanly. Poor installation or cheap vinyl can cause issues — choose the installer carefully.
Can I design the wrap myself?
You can create the concept, but the production file needs a designer experienced with wraps — templates, panel breaks, and installation distortion are specialist knowledge.
The bottom line: A vehicle wrap is a 3D print job. Template, scale, vector artwork, panel-aware design — get those right and your vehicle becomes the hardest-working ad you own.
Vehicle Wrap Artwork FAQ: 8 Questions Answered
Everything print shops wish clients knew about vehicle wrap artwork before submitting files.
What file format should vehicle wrap artwork be?
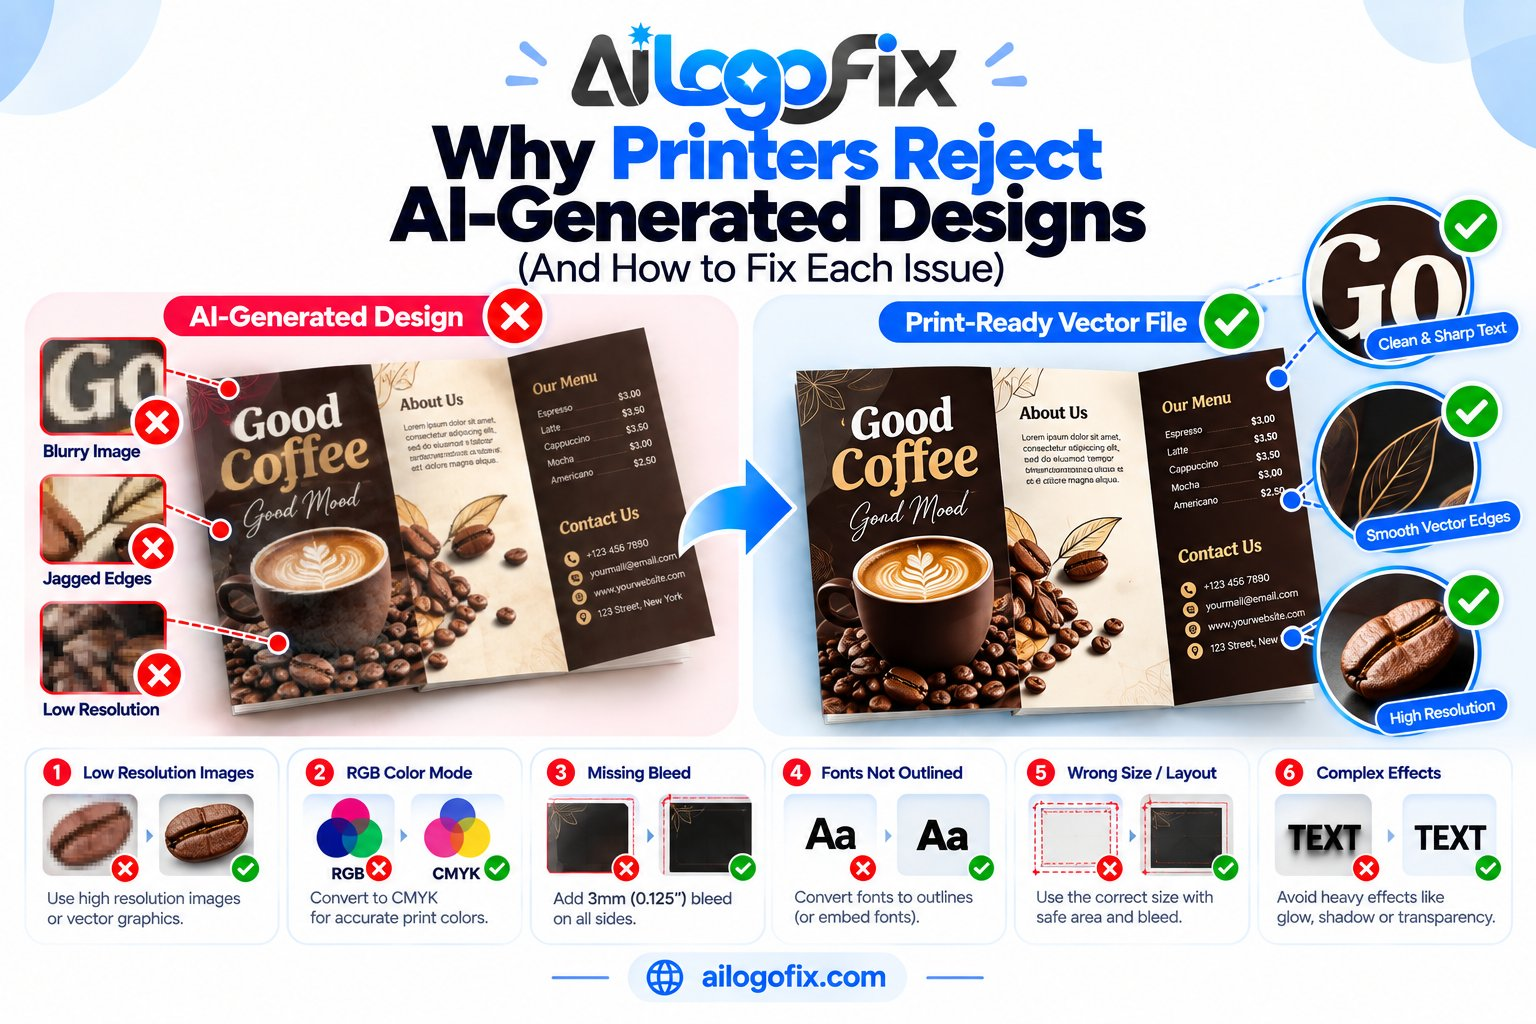
Vector formats win every time. Submit your vehicle wrap artwork as AI, EPS, or PDF with vector elements preserved. Vectors scale to full vehicle size without any quality loss, which matters when a logo must stretch across a van side panel. If your design includes photographic elements, supply those as high-resolution raster images (150 DPI at full scale) embedded or linked in the vector file. Avoid flattened JPEGs as your master file. Print shops can work with layered PSD files too, but vector-based vehicle wrap artwork gives the cleanest prints and fastest turnaround.
What scale should I design vehicle wrap artwork at?
Most shops accept full-scale files, but 1:10 or 1:20 scale is common for vehicle wrap artwork because full-size files get enormous. At 1:10 scale, a 5-meter van side becomes a manageable 500mm document. The critical rule: multiply your resolution accordingly. Artwork designed at 1:10 scale needs 10x the DPI, so 150 DPI at full scale means 1500 DPI in a 1:10 file. Vector elements ignore this math entirely, which is another reason professional vehicle wrap artwork stays vector-first. Always ask your specific print shop which scale they prefer before you start.
What resolution do photos need in vehicle wrap artwork?
Target 100 to 150 DPI at final printed size. That sounds low compared to the 300 DPI rule for brochures, but wraps are viewed from several meters away. A billboard viewed from the road needs even less. For vehicle wrap artwork, effective resolution matters more than file resolution: a 300 DPI image scaled up 300% in layout drops to 100 DPI effective. Check effective DPI in Photoshop or Illustrator after placing every image. Anything under 75 DPI at full scale will look soft on the finished wrap. When in doubt, test-print a cropped section at full size before committing to the whole job.
Should vehicle wrap artwork be CMYK or RGB?
Design in CMYK from the start. Large-format printers convert everything to their ink set anyway, and starting in RGB guarantees color surprises in your vehicle wrap artwork. Bright RGB blues and greens shift the most in conversion. Set your document to a CMYK working space, and ask the print shop for their ICC profile if they have one. For brand-critical colors, specify Pantone references so the shop can match them deliberately. Note that vehicle wrap vinyl has a narrower color gamut than coated paper, so extremely saturated colors may print slightly muted no matter what you do.
How much bleed does vehicle wrap artwork need?
More than you think. While paper printing uses 3mm bleed, vehicle wrap artwork typically needs 50 to 150mm of extra image beyond panel edges, depending on the vehicle and the installer’s preference. This excess wraps around edges, tucks into panel gaps, and covers recessed areas like door handles. The exact amount varies by vehicle template, so download the shop’s template for your specific make and model. Extend backgrounds and patterns generously past every cut line. Unlike paper bleed, wrap bleed is functional material the installer physically stretches and tucks, so skimping here causes real installation problems.
Can I use my existing logo in vehicle wrap artwork?
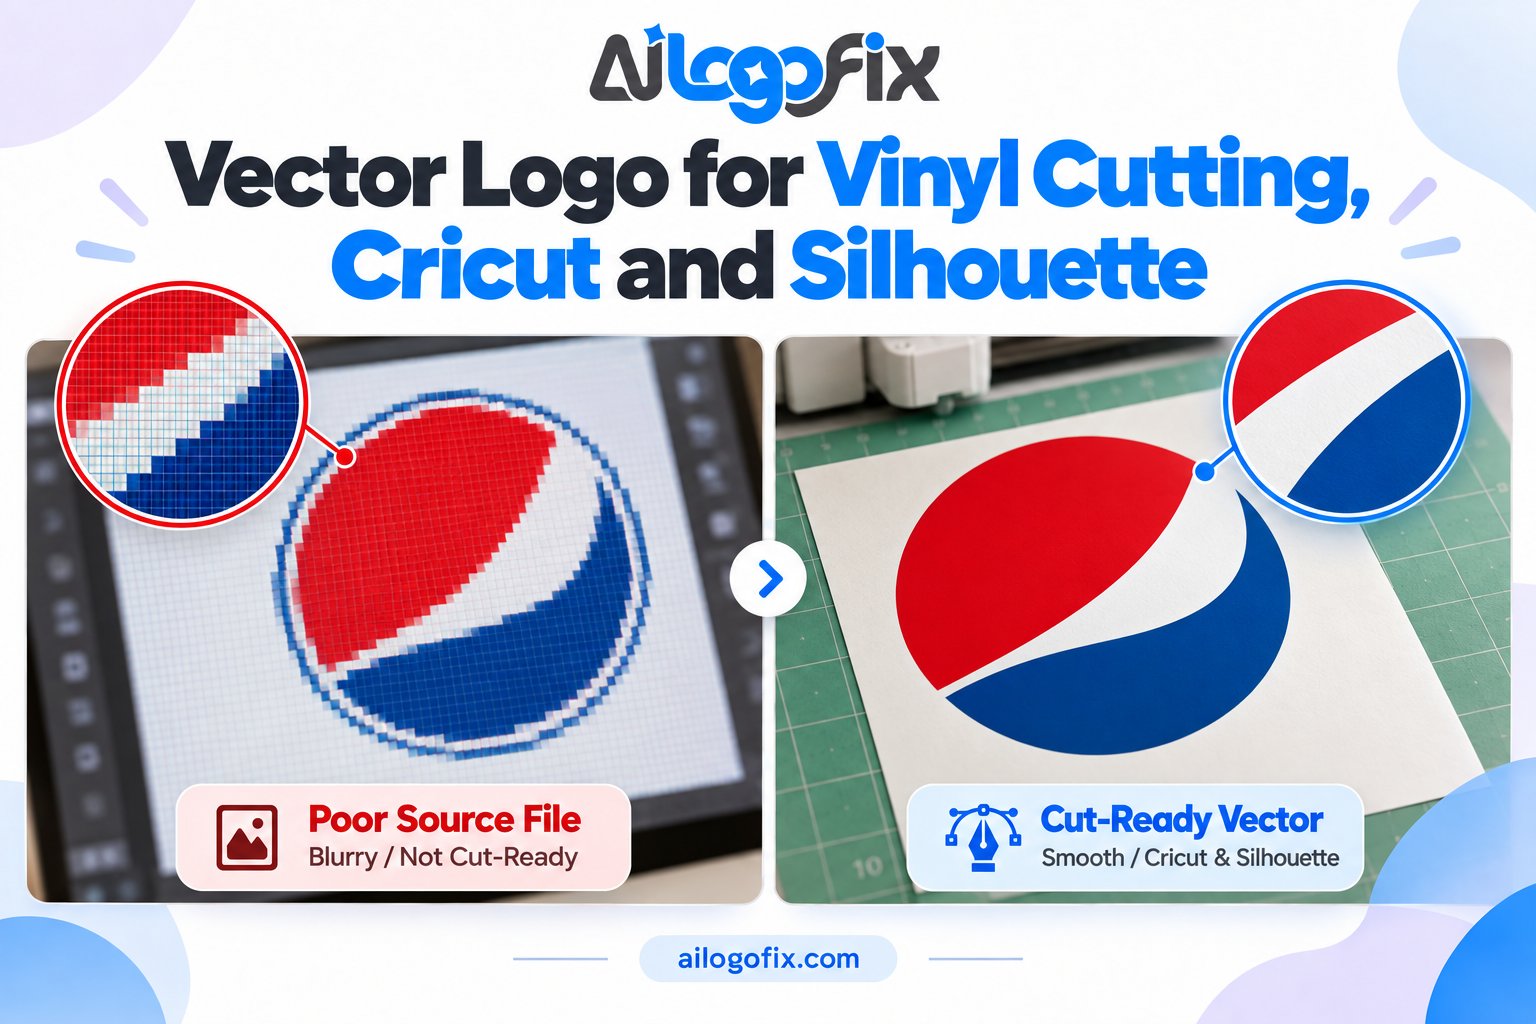
Only if you have it as a true vector file. A PNG from your website will pixelate badly when blown up to vehicle scale. Your vehicle wrap artwork needs the logo as AI, EPS, SVG, or vector PDF. If all you have is a small raster logo, get it converted to vector before designing anything. This is the single most common file problem print shops see. A crisp vector logo keeps edges sharp at any size and lets the shop recolor or resize it without asking you for new files. Do this step first, not last.
How do I handle text on curved vehicle panels?
Keep text on the flattest panels and keep it large. Text placed over deep curves, wheel arches, or door seams distorts and becomes unreadable in finished vehicle wrap artwork. As a rule, body text should be at least 50mm tall at full scale, and critical info like phone numbers even larger. Convert all text to outlines before submitting so font issues cannot break your layout. Avoid thin serif fonts at small sizes; bold sans-serifs survive the viewing distance and the vinyl texture best. Mock up text placement on the vehicle template and view it at simulated distance.
What is a vehicle template, and where do I get one?
A vehicle template is a scaled outline drawing of your exact vehicle showing every panel, window, handle, and seam. Good vehicle wrap artwork is always built on an accurate template. Reputable sources include Pro Vehicle Outlines and the template library your print shop provides. Free templates from random websites are often inaccurate, which leads to misaligned graphics. Always confirm the template matches your vehicle’s year, make, model, and trim. Design on a locked template layer, and never scale the template itself. The small cost of an accurate template prevents expensive reprints.
7 Vehicle Wrap Artwork Mistakes (and How to Fix Each)
1. Submitting a small raster logo. The number one killer of vehicle wrap artwork is a 500px website logo stretched across a van. Fix: obtain or commission a true vector version of every logo before designing. No vector, no wrap.
2. Designing at the wrong scale. Mixing full-scale and scaled elements creates resolution chaos. Fix: pick one scale (ask the shop), build the entire vehicle wrap artwork file at that scale, and verify effective DPI on every placed image.
3. Forgetting panel breaks. Doors open, seams split graphics, and handles interrupt layouts. Fix: design on the vehicle template with panel breaks visible, and keep critical elements away from seams. Review a 3D mockup if the shop offers one.
4. Tiny text. A phone number readable on screen vanishes at 10 meters on the road. Fix: set minimum text heights (50mm+ for body, larger for contact info) and test readability in your vehicle wrap artwork at simulated viewing distance.
5. RGB color mode. Neon screen colors print dull and shifted. Fix: build all vehicle wrap artwork in CMYK, soft-proof with the shop profile, and specify Pantone values for brand colors.
6. No bleed past edges. Artwork that ends exactly at the cut line leaves white gaps after trimming and stretching. Fix: extend backgrounds 50-150mm past every edge per the installer’s spec. When in doubt, add more.
7. Un-outlined fonts. Missing fonts reflow text or substitute ugly defaults at the RIP stage. Fix: convert all text to outlines in your final vehicle wrap artwork file, and keep an editable copy with live text archived separately.
The vehicle vinyl wrap process explains why installers need such generous bleed and accurate templates.
The Vehicle Wrap Production Pipeline
Understanding what happens after you submit vehicle wrap artwork helps you prepare files the shop loves.
Step 1: Preflight. The shop opens your vehicle wrap artwork and checks scale, resolution, color mode, fonts, and bleed. Files that fail preflight go back to you, costing days. Clean files move straight to proofing.
Step 2: Proofing. You receive a scaled proof showing panel breaks and seams. Review it carefully on screen and, for critical jobs, request a printed section at full scale. This is your last cheap chance to catch errors in the vehicle wrap artwork.
Step 3: RIP and color management. The file goes through raster image processing, where the RIP software converts your vehicle wrap artwork into printer-ready data using the shop’s ICC profiles. This is where RGB files and uncalibrated colors cause surprises.
Step 4: Printing. Large-format printers lay down ink on vinyl rolls. Modern wide-format printers handle the scale easily, but print quality still depends entirely on your file preparation.
Step 5: Lamination. A protective laminate goes over the print, adding UV resistance and the desired finish (gloss, matte, or satin). Your vehicle wrap artwork colors shift slightly under laminate, which experienced shops account for in their profiles.
Step 6: Installation. Certified installers apply the vinyl panel by panel, stretching it over curves and tucking edges. Generous bleed in your vehicle wrap artwork is what makes this step possible without white gaps.
Vehicle Wrap Artwork Preflight Checklist
- Vehicle template matches exact year, make, model, and trim
- Document scale confirmed with the print shop (full size, 1:10, or 1:20)
- All logos and text elements are true vector, not scaled rasters
- Photos at 100-150 DPI effective at final printed size
- Document color mode set to CMYK throughout
- Backgrounds extended 50-150mm past all cut lines
- All text converted to outlines; editable copy archived
- Critical text and logos kept clear of panel breaks and seams
- Pantone references noted for brand-critical colors
- File submitted as PDF, AI, or EPS with the shop’s naming convention
Pro Tips for Vehicle Wrap Artwork That Lasts
Design for motion. Wraps are read in 3 seconds from a moving car. One bold message, one contact method, one strong visual. Detailed vehicle wrap artwork with paragraphs of text gets ignored at 60 km/h.
Respect the 3-meter rule. Print a section of your vehicle wrap artwork at full scale, tape it to a wall, and step back 3 meters. If the headline is not instantly readable, enlarge it. This single test catches most text-size mistakes.
Use the vehicle’s lines. Great vehicle wrap artwork flows with body creases and panel shapes instead of fighting them. Align graphic elements with the vehicle’s natural lines for a factory-painted look.
Plan for dirt. Lower panels get filthy. Keep light backgrounds and critical details higher on the vehicle, and expect the bottom 300mm of any vehicle wrap artwork to live in the splash zone.
Think in panels. Each printed panel is a separate piece of vinyl. Design so panel boundaries fall in low-detail areas, and avoid placing faces or logos where a seam will slice through them.
When to Hire a Designer for Vehicle Wrap Artwork
Simple text-and-logo wraps can be templated, but professional vehicle wrap artwork pays for itself when the stakes are high.
Your logo is not vector. This is the most common reason to hire help. A designer will redraw your logo as a true vector, the foundation every piece of vehicle wrap artwork needs.
You are wrapping a fleet. Consistent vehicle wrap artwork across different vehicle models requires adapting one design system to many templates. Designers build this efficiently.
The shop keeps rejecting your files. Repeated preflight failures mean the file setup is beyond DIY fixes. A designer who understands vehicle wrap artwork production eliminates the back-and-forth.
Need wrap-ready files without the headache? Message our design team for vector logos and print-ready vehicle wrap artwork that shops accept first time.
Vehicle Wrap Glossary
Bleed: Extra image area past cut lines, tucked during installation of vehicle wrap artwork.
Cast vinyl: Premium conformable film for curves and long-term wraps.
Calendared vinyl: Budget film suited to flat surfaces and short-term use.
Laminate: Protective clear film applied over printed vinyl.
Panel: A single printed vinyl section; wraps are built panel by panel.
RIP: Software that converts vehicle wrap artwork into printer data.
Template: Scaled vehicle outline showing panels, seams, and obstacles.
Weed: Removing excess vinyl around cut graphics (more relevant to decals).
ICC profile: Color data describing a specific printer, ink, and media combination.
Overlaminate: See laminate; the protective layer that determines final finish.
Bottom line: Great vehicle wrap artwork starts with vector logos, respects the template, and gives the installer generous bleed. Get those three right and the rest follows.