
Flyer Sizes and Bleed: A Setup Guide for Print-Ready Flyers
Nothing ruins a flyer faster than wrong sizing: text trimmed off, white edges, or a blurry enlargement. The fix is boring but essential — correct flyer bleed, exact trim sizes, and proper resolution from the start. This is the setup guide to get it right the first time.
In This Guide
- Standard Flyer Sizes
- Flyer Bleed: How It Works
- Safe Margins and Resolution
- One-Sided vs Two-Sided
- From AI Mockup to Print-Ready
- FAQs
- Flyer Sizes and Bleed: Complete FAQ
- 7 Flyer Size Mistakes (and How to Fix Each)
- Building a Flyer Design System
- Flyer Preflight Checklist
- Pro Tips for Flyers That Get Kept
- When to Hire a Designer for Flyers
- Flyer Printing Glossary
- Flyer Distribution: Getting Them Seen
Quick answer: The most common flyer sizes are A5 (148 × 210mm) and A4 (210 × 297mm), or US Letter (8.5 × 11 in). Add 3mm bleed on all sides, work at 300 DPI in CMYK, keep text 5mm+ inside trim, and export a print-ready PDF.
Standard Flyer Sizes
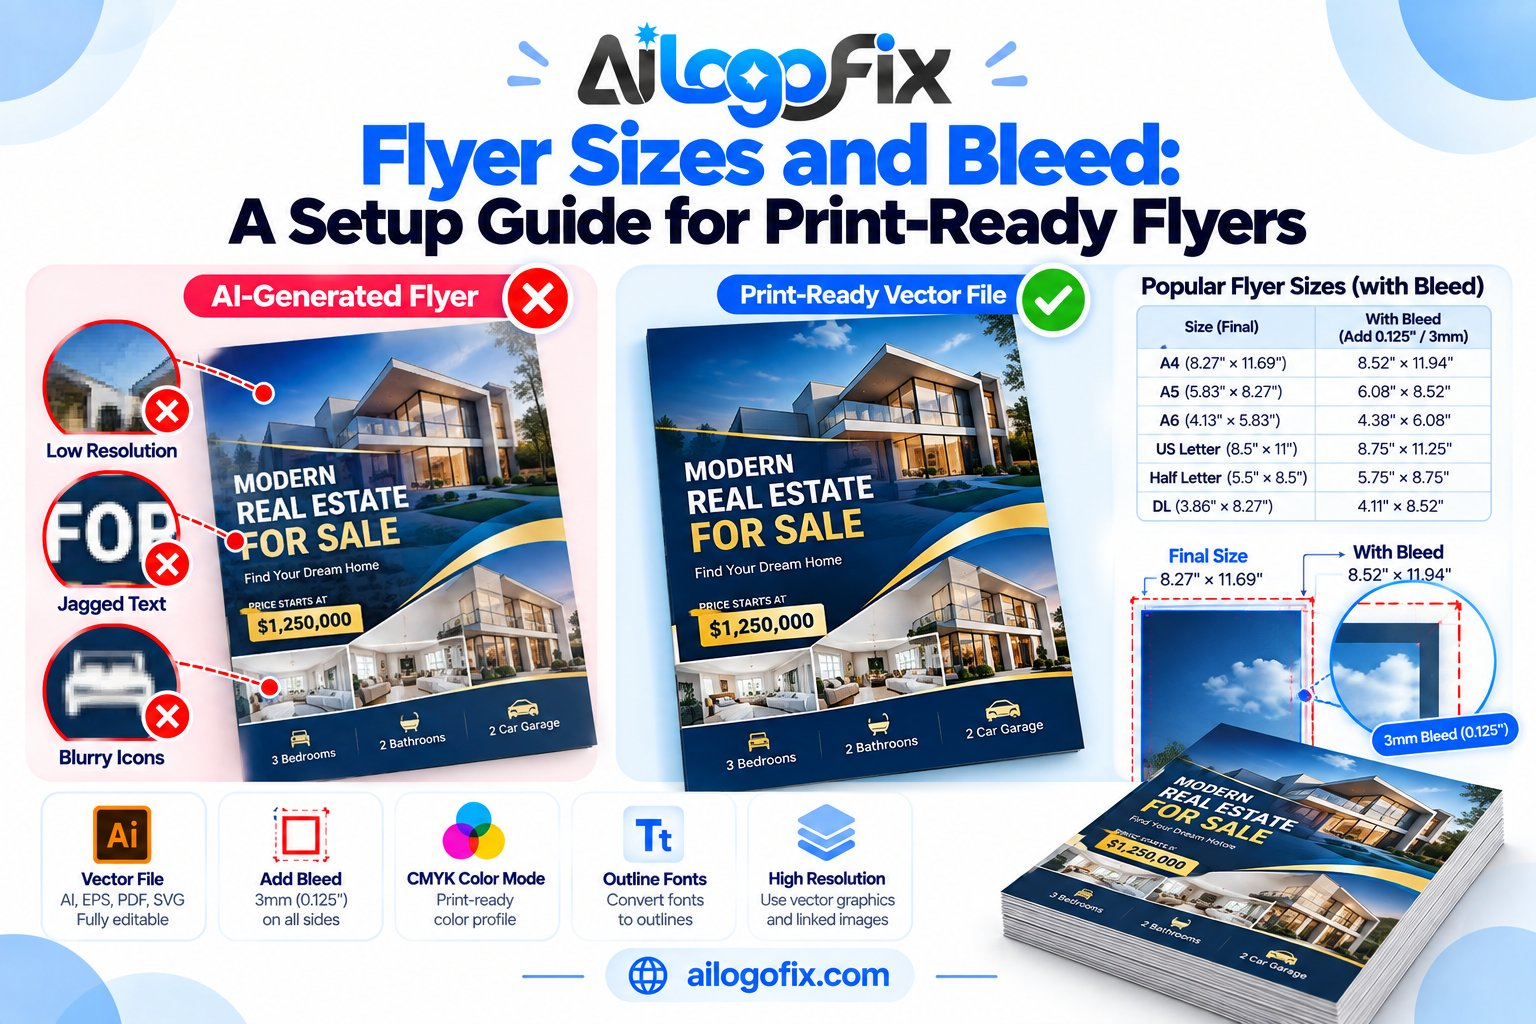
| Size | Trim dimensions | With 3mm bleed | Pixels at 300 DPI |
|---|---|---|---|
| A7 | 74 × 105mm | 80 × 111mm | 945 × 1311 |
| A6 | 105 × 148mm | 111 × 154mm | 1311 × 1819 |
| A5 | 148 × 210mm | 154 × 216mm | 1819 × 2551 |
| A4 | 210 × 297mm | 216 × 303mm | 2551 × 3579 |
| US Letter | 8.5 × 11 in | 8.75 × 11.25 in | 2625 × 3375 |
| DL | 99 × 210mm | 105 × 216mm | 1240 × 2551 |
Flyer Bleed: How It Works
Flyer bleed is the 3mm (0.125 in) of extra artwork extending past the trim line on every side. The guillotine cutter isn’t perfectly precise — bleed gives it margin so the cut never exposes unprinted paper.
Setting up flyer bleed: create your document at trim size + bleed (e.g. 154 × 216mm for A5). Extend all backgrounds, photos, and color blocks fully into the bleed. Keep text and logos out of it — bleed is cut away and discarded.
The telltale sign of missing flyer bleed: thin white lines along one or more edges of the finished flyer. If you’ve seen them, you know.
Safe Margins and Resolution
Keep all important content at least 5mm inside the trim edge. Work at 300 DPI at final size — a flyer designed at 72 DPI and enlarged will print soft and pixelated. Use CMYK color throughout. Reference: RGB vs CMYK vs Pantone.
One-Sided vs Two-Sided
Two-sided flyers double your space for a small cost increase. Set up front and back as separate pages in one document, keeping margins mirrored (the back’s “left” is the front’s “right” when flipped). Export as a 2-page print-ready PDF.
From AI Mockup to Print-Ready
Working from an AI-generated flyer design? The sizes and bleed above are what your rebuild must target. Full workflow: AI flyer to print-ready file.
FAQs
How much bleed does a flyer need?
3mm (0.125 inches) on all four sides — the universal standard for flyers.
What is the most common flyer size?
A5 (148 × 210mm) for handouts and A4 (210 × 297mm) for posters and premium flyers. US Letter dominates in North America.
What resolution should a flyer be?
300 DPI at the final trim size. Never design at screen resolution (72/96 DPI) and enlarge.
Why does my flyer have white edges after printing?
Missing bleed. The cutter landed on unprinted paper because no extra artwork extended past the trim line.
Should flyers be CMYK or RGB?
CMYK for print. Convert before designing where possible, and always before export.
What file format for flyer printing?
Print-ready PDF with bleed, crop marks, and embedded fonts.
The bottom line: Flyer bleed, exact trim size, 300 DPI, CMYK — four numbers that decide whether your flyer looks professional or homemade. Set them up right and the rest is design.
Flyer Sizes and Bleed: Complete FAQ
Every question designers ask about flyer sizes and bleed — answered in depth.
What is the standard flyer size?
There is no single global standard, but A5 (148 x 210mm) and A4 (210 x 297mm) dominate international markets, while US printers most often run 8.5 x 11 inch letter flyers and 4 x 6 inch postcard flyers. DL (99 x 210mm) is the go-to for rack displays and hotel lobbies because it fits standard brochure holders. Your choice of flyer sizes and bleed setup should start with distribution: hand-to-hand flyers can be smaller and bolder, while mailed flyers need to survive postal handling. Always confirm your printer stocks your chosen size — custom trimming adds cost and turnaround time.
How much bleed do flyers actually need?
The industry standard for flyer sizes and bleed is 3mm on every side (0.125 inch in the US). This sacrificial margin gets trimmed away, guaranteeing ink runs cleanly to the paper edge even when the cutter drifts slightly. For large-format flyers (A3 and above), increase bleed to 5mm. Bleed is non-negotiable for any design with background color, images, or graphics touching the edge — but even mostly-white flyers benefit, since it gives the printer tolerance. Set bleed in your document setup dialog before designing, not as an afterthought at export.
What is the safe zone, and why does it matter?
The safe zone (or quiet zone) is the inner margin — typically 10mm from trim on standard flyers, more on large formats — where all critical text and logos must live. Guillotine cutters can drift 1-2mm, and anything in the danger zone risks partial clipping. When planning flyer sizes and bleed, beginners obsess over bleed but forget the safe zone; professionals respect both. Headlines, contact details, and calls to action belong well inside. Backgrounds and decorative elements can bleed freely.
What DPI should images be for flyers?
300 DPI at final placed size — no exceptions for quality flyer sizes and bleed work. A 300 DPI image placed at 50% scale effectively becomes 600 DPI (fine); placed at 200% it drops to 150 DPI (visibly soft). Check effective DPI in InDesign or Illustrator, not just the file’s native resolution. Vector logos and text are resolution-independent and always preferred. Web images at 72 DPI will look acceptable on screen but print as blurry mush — the most common reason flyers disappoint.
Should flyer files be CMYK or RGB?
CMYK from the very first click. Designing flyer sizes and bleed layouts in RGB then converting at export causes unpredictable color shifts — vibrant screen blues turn dull purple, neon greens go muddy. Set your document color mode to CMYK before placing a single element. If you must convert RGB photos, do it deliberately in Photoshop where you can control the rendering intent, not as a blind export-time conversion. Provide Pantone references for brand-critical colors.
Can I use one design for multiple flyer sizes?
Only with manual adaptation. Scaling an A4 design down to DL makes body text microscopic and crams the layout. Proper flyer sizes and bleed workflow means rebuilding the layout per format: adjust font sizes proportionally, re-crop images, rebalance white space. The hierarchy that works at A4 needs rethinking at postcard size. Budget design time per size rather than hoping one file stretches.
What paper weight is best for flyers?
170-250gsm covers most flyer sizes and bleed applications. Lightweight 130-170gsm suits high-volume handouts and inserts; 200-250gsm gives premium feel for real estate, automotive, and luxury promotion; 300gsm+ enters rigid card territory. Uncoated stock takes pen ink (good for forms); silk/gloss makes colors pop. Match weight to purpose — a flimsy luxury flyer undermines its message, while an overbuilt takeaway menu wastes money.
How do I export print-ready flyer PDFs?
Export as PDF/X-1a or PDF/X-4 with bleed and crop marks enabled, fonts embedded, and images at full resolution. In your flyer sizes and bleed document, verify the PDF page size equals trim + bleed (e.g., A4 with 3mm bleed = 216 x 303mm). Open the exported PDF and check: bleed present on all sides, no RGB objects (use Acrobat’s preflight), fonts embedded, and images at 300 DPI effective. Send a low-res preview alongside for the printer’s quick visual check.
7 Flyer Size Mistakes (and How to Fix Each)
1. Designing at screen resolution. A 1920px canvas is not a flyer size — it is roughly 163mm wide at 300 DPI, far from A4. Fix: create documents using real-world units (mm/inches) at 300 DPI from the start. Every professional flyer sizes and bleed workflow begins with correct document setup.
2. Forgetting bleed entirely. Designing exactly to trim dimensions guarantees white slivers after cutting. Fix: add 3mm bleed in document setup and extend all edge graphics fully into it. Check the exported PDF shows the larger bleed box.
3. Text kissing the trim edge. Cutters drift; tight headlines get scalped. Fix: pull all critical content 10mm+ inside trim. Use guides to mark the safe zone visibly while designing your flyer sizes and bleed layout.
4. Wrong aspect ratio for the stock. An A4-proportioned design printed on DL gets awkwardly cropped or stretched. Fix: confirm the exact stock size with your printer first, then build flyer sizes and bleed to match. Never assume.
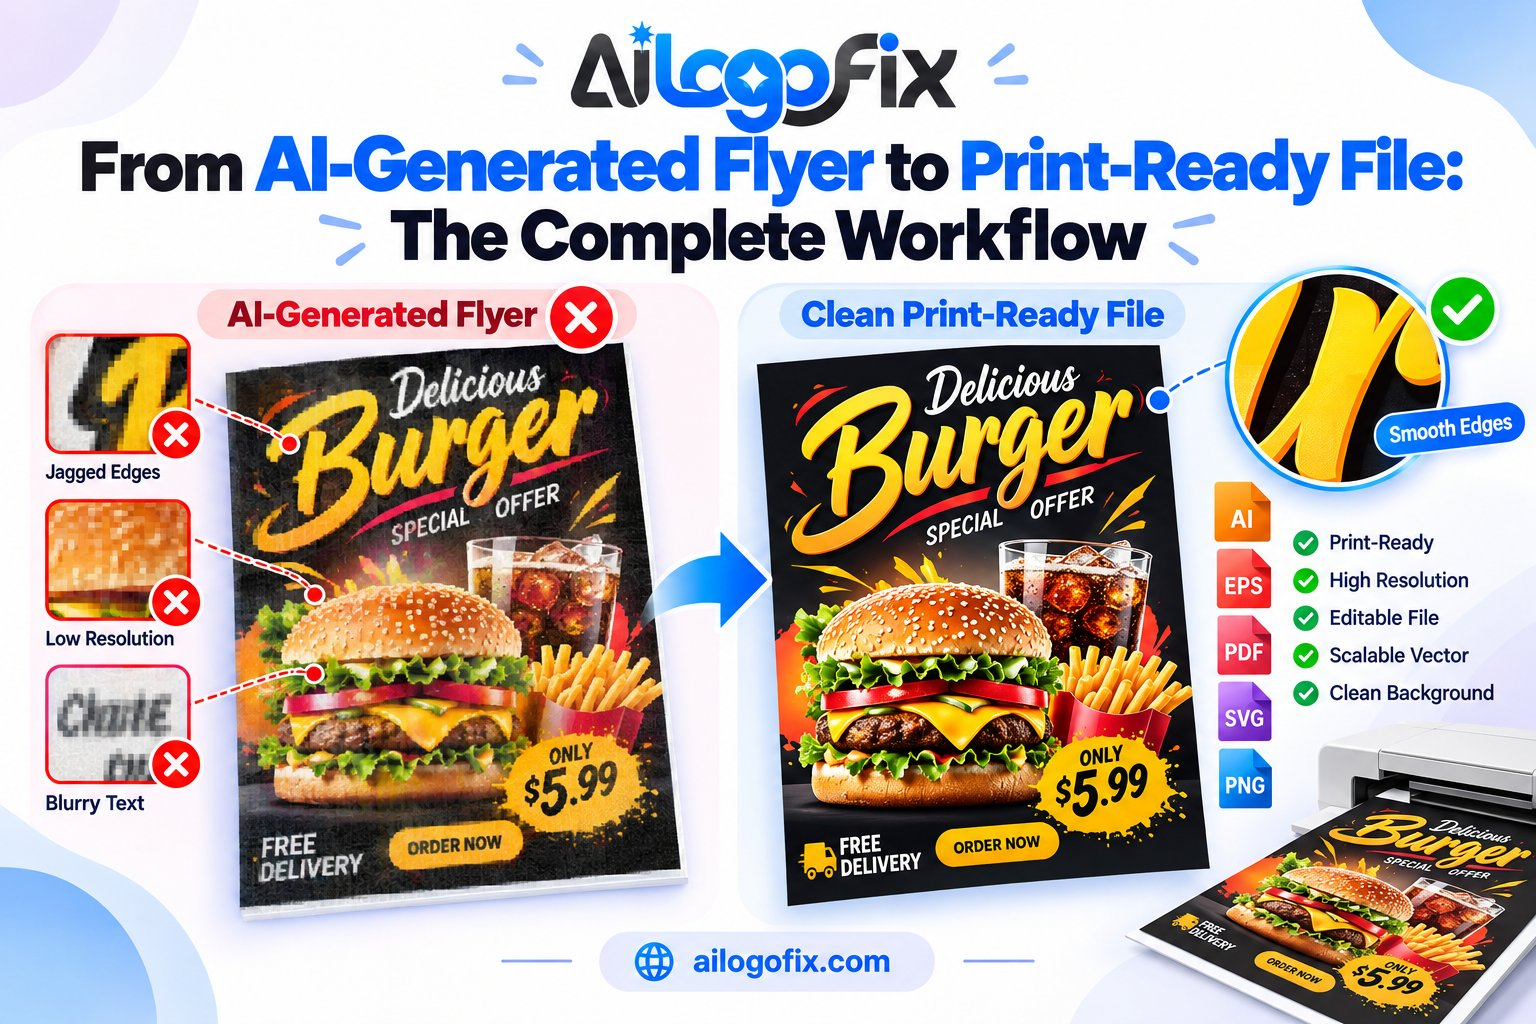
5. Low-resolution images placed large. That crisp thumbnail becomes a blurry mess at A4. Fix: check effective DPI after placing every image. Replace anything under 250 DPI. For logos, use vector — convert to vector if you only have a PNG.
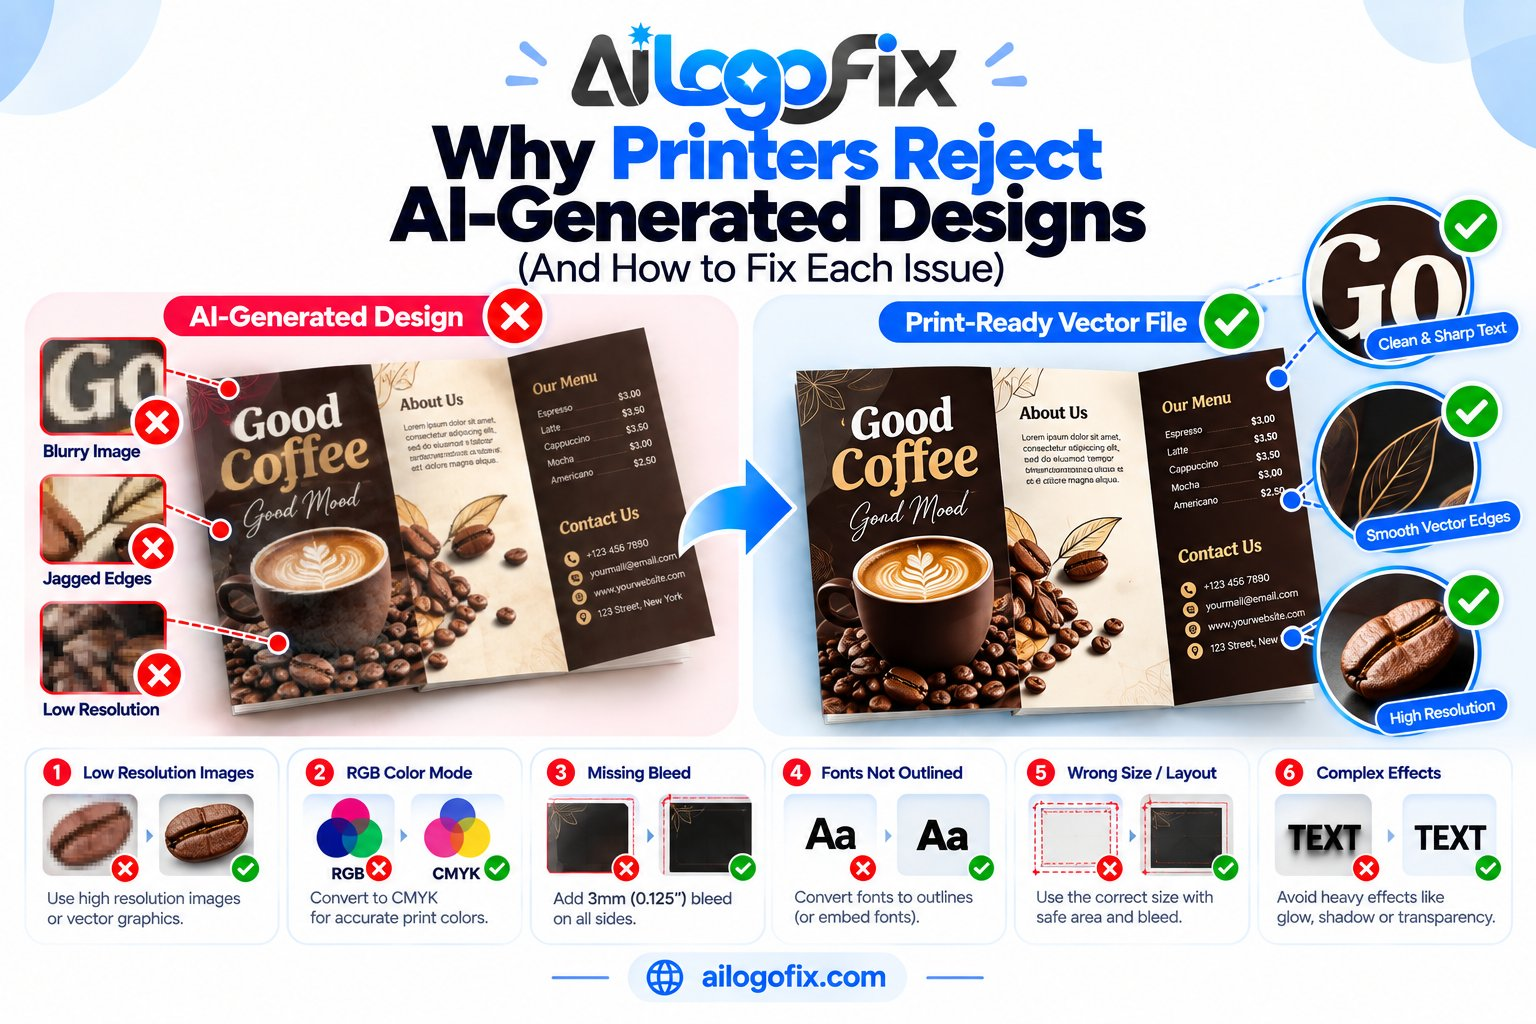
6. RGB-to-CMYK surprises. Neon screen colors die in conversion. Fix: work in CMYK throughout, soft-proof with the printer’s ICC profile, and request a hard proof for color-critical flyer sizes and bleed jobs.
7. Ignoring the reverse side. Double-sided flyers double your canvas but many designers treat the back as an afterthought. Fix: plan both sides with equal care — same bleed, margins, and color discipline. The back often carries the call to action.
Global paper dimensions follow the ISO 216 standard, which defines the A, B, and C series used for flyers worldwide.
Building a Flyer Design System
One-off flyers waste effort. A simple system makes every future flyer faster and more consistent.
Lock your sizes. Standardize on 2-3 flyer sizes and bleed presets your business actually uses. Save them as document presets with bleed, margins, and color mode preconfigured. Every new flyer starts correctly.
Template the repeating parts. Headers, footers, contact blocks, disclaimers, and calls to action should be reusable components. Build them once as vector assets; drop them into each new flyer sizes and bleed layout.
Document your specs. A one-page spec sheet — sizes, bleed, color builds, fonts, logo usage, export settings — lets any designer (or future you) produce on-brand flyers without guesswork. This is a mini brand guide for print.
Version your files. Keep native files, fonts, linked images, and exported PDFs together per campaign. When the client asks for “the same flyer but for spring,” you are editing — not rebuilding.
Review against the checklist. Before every export, run the preflight list below. Two minutes of checking prevents the sinking feeling of spotting an error on 5,000 printed flyers.
Flyer Preflight Checklist
- Document size matches chosen flyer size plus 3mm bleed all sides
- All images 300 DPI effective at placed size
- CMYK color mode throughout, no RGB stragglers
- Critical text 10mm+ inside trim edge
- Fonts embedded or converted to outlines
- Logo is vector format, not a scaled web PNG
- Backgrounds and edge graphics extend fully into bleed
- Exported PDF/X with bleed, crop marks, and embedded fonts
- Back side (if any) gets identical preflight treatment
Pro Tips for Flyers That Get Kept
Lead with the offer, not the logo. Readers decide in two seconds whether to keep or bin your flyer. The headline should promise value; the logo just signs it. Great flyer sizes and bleed execution cannot save a weak message.
One call to action. “Call now,” “Scan to book,” “Visit Saturday” — pick one. Flyers with three competing CTAs get none of them.
White space is a feature. Crammed flyers feel cheap and get skipped. Generous margins and breathing room signal confidence and quality.
Understanding how DPI actually works will change how you judge image quality — screen appearance tells you almost nothing about print readiness.
Match paper to message. Heavy silk stock for luxury, recycled uncoated for eco brands, cheap gloss for high-volume handouts. The stock is part of the message.
Test with real people. Show the flyer at actual size to someone unfamiliar for five seconds, then ask what it was about. If they cannot answer, redesign — no amount of flyer sizes and bleed precision fixes unclear communication.
When to Hire a Designer for Flyers
Canva handles simple announcements, but professional design pays for itself when results matter.
Your logo is low-resolution. A blurry logo tanks flyer credibility instantly. Designers start by securing a true vector logo — the non-negotiable foundation of professional flyer sizes and bleed files.
You need multiple formats. A4, DL, social, and poster versions require real layout adaptation, not just resizing. Designers rebuild each format properly.
It is a high-stakes campaign. Product launches, property sales, major events — when the flyer carries serious revenue, design quality directly affects response rates.
Print keeps failing. If printers keep rejecting your files or prints come back wrong, a designer who understands flyer sizes and bleed prepress eliminates the cycle.
Need flyers people actually keep? Talk to our design team — from vector logos to print-ready files, we handle the entire workflow.
Flyer Printing Glossary
Bleed: Extra printed area past trim (standard 3mm) removed during cutting.
Trim size: Final dimensions after the bleed is cut away.
Safe zone: Inner margin (10mm+) protecting text from cutter drift.
GSM: Paper weight in grams per square meter.
CMYK: Four process inks for full-color printing.
Spot UV: Glossy coating applied to selected areas for contrast.
Saddle stitch: Stapled booklet binding (for multi-page flyers).
Stock: The paper or board being printed on.
Preflight: Technical file check before printing.
Proof: Test print for approval before the full run.
Flyer Distribution: Getting Them Seen
Perfect flyer sizes and bleed mean nothing if the flyers never reach the right hands. Distribution strategy matters as much as design.
Match size to placement. DL flyers fit brochure racks; A5 works for hand-to-hand; A4 suits noticeboards. Your flyer sizes and bleed choices should anticipate exactly where each flyer will live.
Hand-to-hand hotspots. Train stations, shopping streets, event queues — anywhere your audience waits. A6 or DL flyers work best here; they pocket easily. Bold headlines matter because you get two seconds of attention.
Direct mail. DL and A5 flyers mail efficiently as self-mailers or inserts. Check postal size and weight limits before finalizing flyer sizes and bleed — oversized pieces incur surcharges.
In-store displays. Counter-top DL holders and A4 poster versions cover both browsing distances. Keep the design system consistent across your flyer sizes and bleed variants so the brand reads as one.
Track what works. Add unique QR codes or offer codes per distribution channel. Knowing which flyer sizes and bleed formats pull best informs your next print run — stop guessing, start measuring.
Bottom line: Nail your flyer sizes and bleed setup once — correct dimensions, 3mm bleed, safe margins, 300 DPI, CMYK — and every flyer you print from that template will look professional. The upfront discipline pays off on every single print run.
One last tip: Save your perfected flyer sizes and bleed document as a reusable template right now — with bleed, safe-zone guides, CMYK mode, and paragraph styles preconfigured. Future flyers then start 90% finished. Share the template with your team so everyone produces print-ready files. Consistency compounds: the tenth flyer from a good template looks as sharp as the first, while tenth-time-from-scratch designs drift. Build the system once, benefit forever.