If your logo only exists as a JPG, PNG, screenshot, scan, or low-resolution image, the best long-term fix is to convert logo to vector so it stays sharp and usable for printing, signage, packaging, apparel, websites, and future design work.
In This Guide
- What Does It Mean to Convert Logo to Vector?
- Why Brand Details Often Get Lost During Vectorization
- Automatic Trace vs Manual Vector Redrawing
- How to Convert Logo to Vector: The 7-Step Process
- What File Formats Should You Receive?
- Common Logo Vectorization Mistakes to Avoid
- Logo Vectorization Quality Checklist
- When Should You Use Professional Manual Vector Redrawing?
- Get a Print-Ready Vector Logo Without Losing Brand Details
- Frequently Asked Questions
- Final Thoughts
- Convert Logo to Vector FAQs
- 2 Costly Mistakes When You Convert Logo to Vector
- When to Hire a Designer to Convert Logo to Vector
However, there is an important difference between simply tracing visible pixels and rebuilding the logo accurately.
The goal is not just to convert logo to vector. The goal is to preserve the brand details that make the logo recognizable: lettering, proportions, spacing, curves, colors, line weights, symmetry, negative space, and visual balance.
Poor vectorization can technically produce an SVG, EPS, AI, or PDF file while quietly changing the logo itself.
A curved letter may become too round, a custom wordmark may lose its personality, or a small gap may disappear. These differences can become obvious when the logo is printed large or used consistently across a brand.
This guide explains how to convert logo to vector without losing those details, when automatic tracing is useful, when manual redrawing is better, and what you should check before accepting the final files.
If your starting file is already blurry, see our raster to vector conversion guide for blurry logos.
What Does It Mean to Convert Logo to Vector?
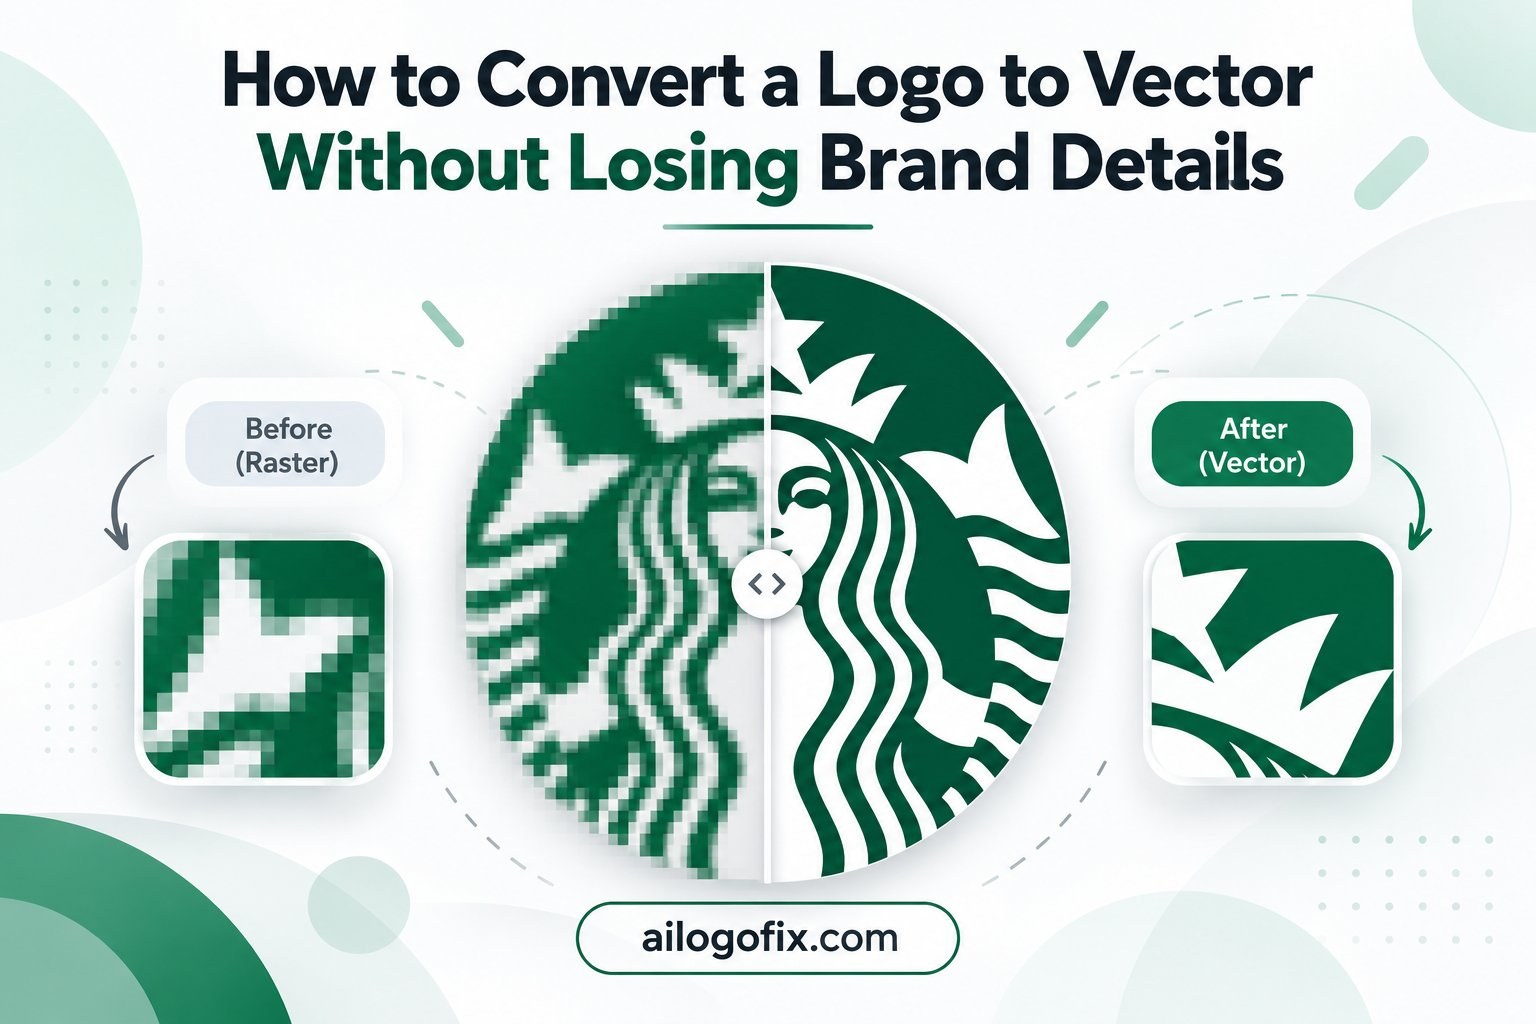
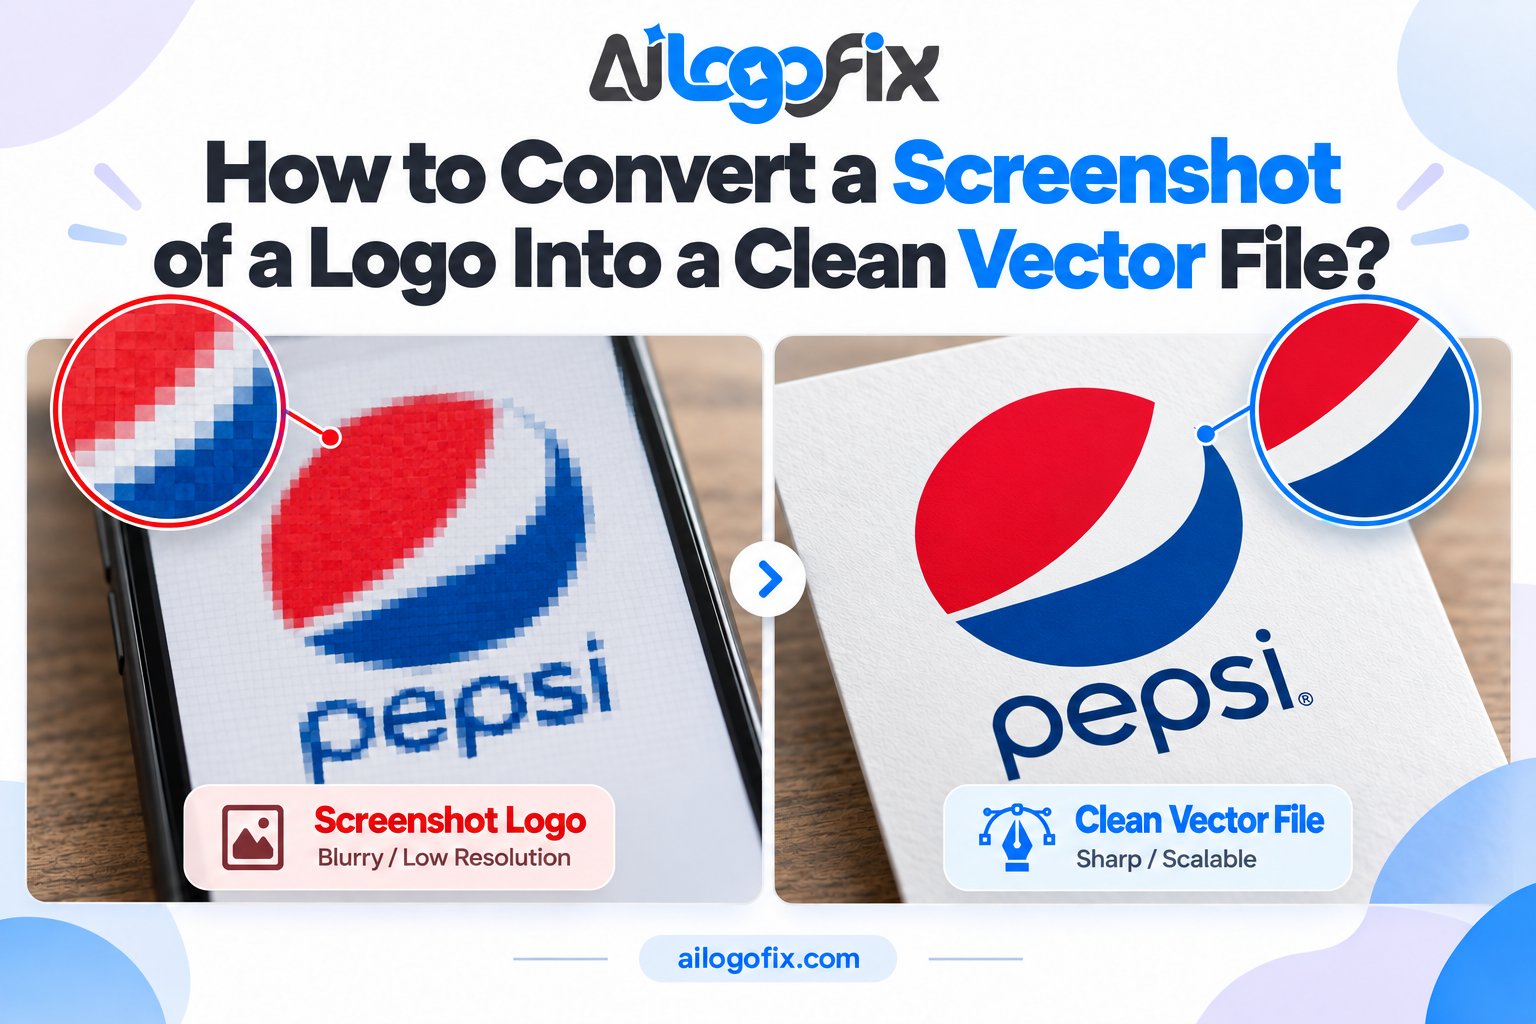
A raster logo is made from pixels. JPG and PNG are common raster formats. They can look sharp at their original size, but when enlarged far enough, the pixels become visible and the edges begin to look blurry or jagged.
A vector logo is built from paths, curves, anchor points, shapes, and editable objects.
Instead of depending on a fixed number of pixels, the software redraws those shapes mathematically at any size.
For the technical background, see vector graphics on Wikipedia.
That is why a properly created vector logo can be used on a small business card and then enlarged for a storefront sign without the same resolution problem.
However, exporting a JPG as SVG, EPS, AI, or PDF does not automatically rebuild the logo as true vector artwork.
A raster image can be embedded inside those file types. What matters is the artwork inside the file.
If you want a deeper explanation of these formats, read What Is a Vector File? AI, EPS, SVG & PDF Explained Simply.
Why Brand Details Often Get Lost During Vectorization
When a logo is vectorized poorly, the final file may be scalable but no longer accurate. This is the biggest risk when you convert logo to vector with a one-click automatic tracer instead of redrawing the artwork carefully.
Common details that can change include typography, custom lettering, letter spacing, icon proportions, smooth curves, sharp corners, symmetry, negative space, line thickness, colors, gradients, and small identifying shapes.
A tiny change in a letter, border, notch, or gap may seem unimportant during tracing, but those details can be part of the brand identity. Small alignment changes can also affect the overall balance of the logo.
The more established the brand is, the more carefully these details should be preserved.
Automatic Trace vs Manual Vector Redrawing
Adobe Illustrator includes Image Trace, and many online tools can turn raster images into vector paths quickly. These tools can be useful, but they do not understand brand intent.
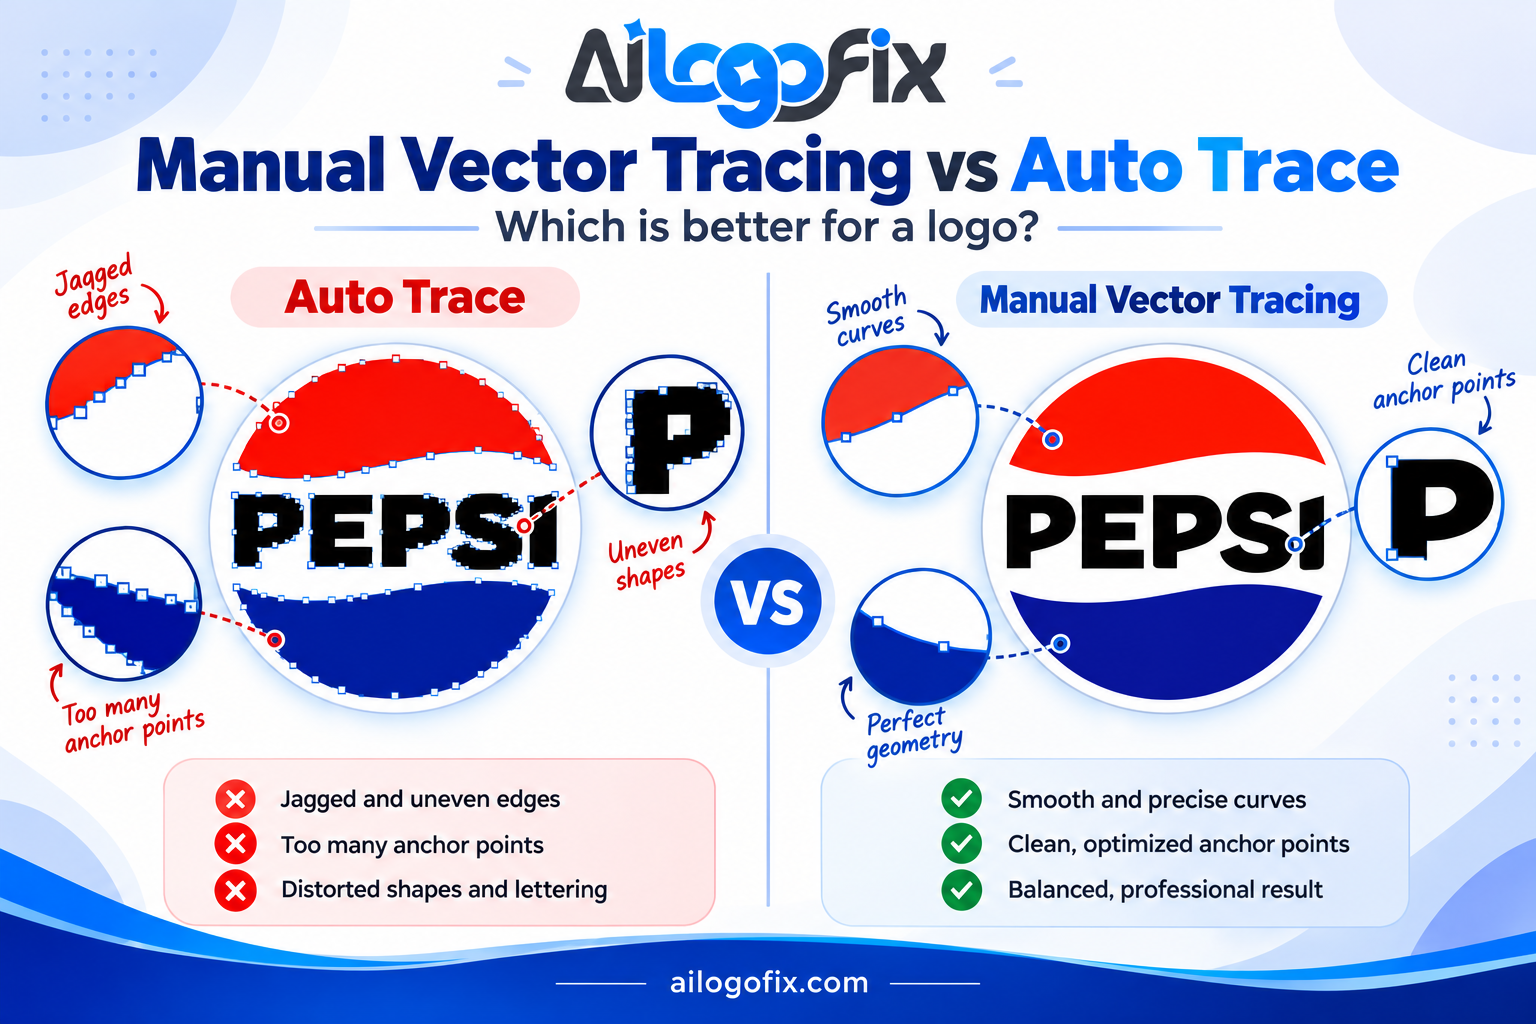
Automatic tracing analyzes visible pixels. If the source contains compression artifacts, blurred edges, shadows, rough anti-aliasing, or distorted text, the software may trace those defects too.
This can create too many anchor points, uneven curves, rough edges, misshaped letters, changed spacing, broken corners, and difficult-to-edit paths.
For a simple black icon with clean edges, automatic tracing may provide a useful starting point. For a brand logo, custom lettering, an old scan, a blurry screenshot, or detailed artwork, manual vector redrawing is usually safer.
Manual redrawing rebuilds the intended geometry rather than copying every damaged pixel. When you convert logo to vector by hand, a designer can decide where a curve should be smooth, where shapes should align, and which imperfections came from the low-quality source rather than the original design.
How to Convert Logo to Vector: The 7-Step Process
Step 1: Start With the Best Source You Can Find
Before vectorizing anything, collect the highest-quality reference available. A cleaner source makes it far easier to convert logo to vector without guessing at damaged details.
Check old email attachments, websites, social-media uploads, printed brochures, packaging files, business cards, and signage photos. You would be surprised how often a better version of the logo is hiding in an old file.
Useful references can include a large PNG, high-resolution JPG, old PDF, AI or EPS file, photographs of signage, or even a sharp photo of printed packaging. Gather everything you can find before you start.
Step 2: Identify What Must Not Change
Before drawing new paths, decide which parts are essential to the brand.
Look closely at the overall silhouette, letter shapes, kerning, symbol proportions, border thickness, and spacing. Make a list of the details that define the logo so you can verify them later.
If the logo has custom lettering, do not automatically replace it with a similar font. The lettering may have been drawn by hand, and even small differences will be noticeable to anyone familiar with the brand.
Step 3: Rebuild the Main Geometry
Start with the largest shapes first.
Circles should be true circles when the design calls for them. Straight edges should stay straight.
Using fewer well-placed anchor points usually produces smoother paths than hundreds of points generated by automatic tracing. Clean geometry is easier to edit and scales more reliably.
The objective is not to trace every pixel. It is to reconstruct the shape those pixels were trying to represent. Think like the original designer, not like a photocopier.
Step 4: Recreate Typography Carefully
Typography is one of the easiest places to lose brand accuracy. When you convert logo to vector, lettering deserves the most careful attention because even tiny changes are easy to spot.
If the original font is known, use the correct typeface and verify its weight, tracking, kerning, size, and baseline alignment against the source.
If the font is unknown, compare distinctive letters carefully. Sometimes a wordmark began as a font that was then customized, so look for the closest match and adjust the details by hand.
For custom lettering, rebuilding the characters manually may be necessary.
Before final delivery, logo lettering is often converted to outlines so the shapes remain consistent even if the recipient does not have the font installed.
Step 5: Match Curves, Corners and Negative Space
Small geometric differences can make a familiar logo feel wrong.
Compare recreated paths with the source at high zoom. Check round letters, icon edges, badge borders, and corner radii to make sure they match the original intent.
Negative space deserves the same attention as filled shapes. The empty area inside a letter or between elements is part of the design, and closing it up changes the logo.
A good vector recreation should preserve both the visible shapes and the spaces between them.
Step 6: Match the Colors Correctly
If the brand has official color values, use them instead of sampling a compressed JPG. JPEG compression shifts colors, so eyedropper samples from a low-quality file are unreliable.
RGB is commonly used for screens and web graphics. CMYK is commonly used for print. Ask which the logo needs, or provide both.
Do not invent a Pantone match from a poor screenshot. If an official brand guide exists, use its documented values; if not, note the limitation in your delivery.
Step 7: Compare the Vector Against the Original
Once the reconstruction is complete, compare the vector and source side by side. This comparison confirms that your work to convert logo to vector has preserved every brand detail.
A useful quality-control method is to overlay one version on top of the other with reduced opacity. Misalignments that are hard to see side by side become obvious in an overlay.
Check overall width and height, icon-to-text relationship, baseline alignment, letter spacing, border weights, and symmetry before you call it done.
The goal is not to preserve flaws caused by pixelation. It is to preserve the intended design.
Step 8: Test the Logo at Small and Large Sizes
A logo should work beyond the zoom level used during editing.
Test it small. Fine details that look good at extreme zoom may disappear or merge when the logo becomes a favicon or an embroidered patch.
Then test it large. Enlarging the vector can reveal uneven paths, distorted circles, wobbly curves, or spacing issues that were invisible at normal sizes.
What File Formats Should You Receive?
A professional vectorized logo should usually be delivered in several useful formats. Any company you hire to convert logo to vector should provide AI, EPS, SVG, and PDF files that contain true vector paths.
AI: useful as an editable Adobe Illustrator source file.
EPS: commonly requested in printing, signage, apparel, and older production workflows.
SVG: ideal for scalable website graphics and many modern digital uses.
PDF: easy to share and widely accepted for printing, but PDF can contain vector or raster content, so verify the artwork inside.
PNG: useful for transparent-background digital use.
JPG: convenient for everyday previews.
The AI, EPS, SVG, or PDF file should contain actual vector paths rather than simply containing an embedded raster image. Always verify before you approve the delivery.
Common Logo Vectorization Mistakes to Avoid
Assuming changing the file extension creates vector artwork.
Trying to convert logo to vector with a free one-click tool and skipping the accuracy checks below.
Trusting automatic tracing without inspecting the paths.
Replacing custom lettering with a random similar font.
Tracing compression artifacts as if they are part of the logo.
Simplifying intentional details just to make tracing easier.
Sampling brand colors from a poor-quality screenshot when better references exist.
Adding hundreds of unnecessary anchor points to curves.
Judging accuracy only at extreme zoom instead of testing real-world sizes.
Logo Vectorization Quality Checklist
Use this checklist every time you convert logo to vector. Before accepting a vectorized logo, check that:
The logo stays sharp at any size.
Important proportions match the original.
Typography and spacing are accurate.
Curves are smooth and paths are clean.
Negative spaces and line weights are consistent.
Colors match reliable brand references.
The logo works at small and large sizes.
Individual elements are editable when appropriate.
The delivered vector files contain true vector artwork.
No important brand detail has accidentally been redesigned.
When Should You Use Professional Manual Vector Redrawing?
You may be able to vectorize a simple clean icon yourself. Professional help becomes more useful when the logo has custom lettering, fine details, or a low-quality source that needs interpretation.
Manual redrawing is also valuable when the logo will be used for signs, apparel, packaging, vehicle wraps, or embroidery, where clean paths and correct colors are non-negotiable.
The more brand-critical the artwork is, the less sense it makes to rely on an unchecked one-click trace. If the logo represents your business, it deserves a careful human eye.
Get a Print-Ready Vector Logo Without Losing Brand Details
AiLogoFix’s specialist team manually converts logos to vector — carefully redrawing every curve, letter, and detail instead of relying on automatic tracing.
With 4,000+ projects completed and unlimited revisions, your logo stays sharp, accurate, and ready for print, signage, and packaging.
Convert My Logo to Vector | message the team for a free file review.
Frequently Asked Questions
Can I convert a JPG logo to vector?
Yes. If the design is recognizable, it can usually be recreated as vector artwork. Manual redrawing works even from a low-resolution JPG, as long as the designer can see what the logo is supposed to look like.
Can I convert a PNG logo to vector?
Yes. A PNG can be used as a reference for vectorization. A transparent PNG may provide cleaner edges than a JPG, but the vector still needs to be redrawn — converting the file format alone does not create vector paths.
Does Adobe Illustrator Image Trace create a professional vector logo?
It can be useful for simple artwork or as a starting point. For blurry, compressed, detailed, or brand-critical logos, Image Trace often produces rough paths that need extensive manual cleanup.
How do I know whether my logo is truly vector?
Open the file in vector-editing software and inspect it. A true vector logo should contain selectable paths and anchor points — not a single embedded image. Try scaling it up; a real vector stays perfectly sharp.
Will vectorizing my logo change the design?
It should not if the goal is faithful recreation. Good vectorization preserves the intended logo while removing only the artifacts caused by low resolution. If the design changes, the vectorization was not done carefully.
What is the best vector format for a logo?
There is no single best format for every situation. AI is useful as an editable master, SVG is excellent for web, EPS is widely requested for print, and PDF is easy to share. A professional delivery usually includes several.
Can a very blurry logo still be recreated?
Often, yes. If the design is recognizable and enough reference information exists, a designer can recreate it. For more on this, see our guide to turning a blurry raster logo into a vector.
Final Thoughts
To convert logo to vector without losing brand details, focus on accuracy rather than speed. A careful manual redraw beats a quick automatic trace every time.
A vector file is most valuable when it is both technically clean and visually faithful. Whether you convert logo to vector yourself or hire a specialist, accuracy should always come before speed.
If your current logo is blurry, pixelated, or trapped inside a JPG or PNG, let AiLogoFix convert it to vector for you — manually redrawn, print-ready, and faithful to your brand.
Convert Logo to Vector FAQs
Quick answers for anyone ready to convert logo to vector format.
How long does it take to convert logo to vector?
Most projects that convert logo to vector finish within 24 to 48 hours. Simple wordmarks can be same-day; intricate illustrated logos take longer because every curve is redrawn by hand. If you need to convert logo to vector urgently for a print deadline, ask about rush service when you order.
What should I send to convert logo to vector?
Send the highest-resolution copy you have: PNG, JPG, PDF, even a screenshot. Designers who convert logo to vector daily can work from surprisingly poor originals. Include brand color codes and font names if you know them, so the team that will convert logo to vector for you can match the original precisely.
Can I convert logo to vector myself for free?
Free auto-trace tools exist, but they copy imperfections instead of correcting them. To truly convert logo to vector at professional quality, the artwork must be redrawn manually with attention to letterforms, symmetry, and spacing. DIY tracing is fine for personal projects; client-facing brands deserve a proper convert logo to vector job by a designer.
2 Costly Mistakes When You Convert Logo to Vector
1. Accepting auto-trace as finished work. Auto-trace produces wobbly paths and distorted type. When you convert logo to vector professionally, insist on manual redrawing and check the result at high zoom before approving.
2. Forgetting the full file package. A single SVG is not enough. Every convert logo to vector order should end with AI, EPS, SVG, PDF, PNG, and JPG, so you never pay for the same conversion twice.
Vector artwork follows mathematical paths rather than pixels; see vector graphics on Wikipedia for the technical background.
When to Hire a Designer to Convert Logo to Vector
Hire a designer when the logo represents your business publicly: on packaging, signage, vehicles, or your website. A bad convert logo to vector job shows up as blurry prints, rejected printer files, and embarrassing large-format displays. It is especially worth professional help when the original is low-resolution, the lettering needs repair, or colors must match brand standards exactly. Our team will convert logo to vector from any source file with a 24 to 48 hour turnaround and a complete format package. Start your vector conversion or message our team for a free assessment of your logo.